Use the narrative engine’s flexibility to create and prototype your playable stories.
You’ve already gone through the Arcweave QuickStart Guide and now you’re hungry for more.
This blog post is the next step. I will demonstrate all the basic features of Arcweave, while I walk you through setting up a short exciting scenario. So, let’s begin.
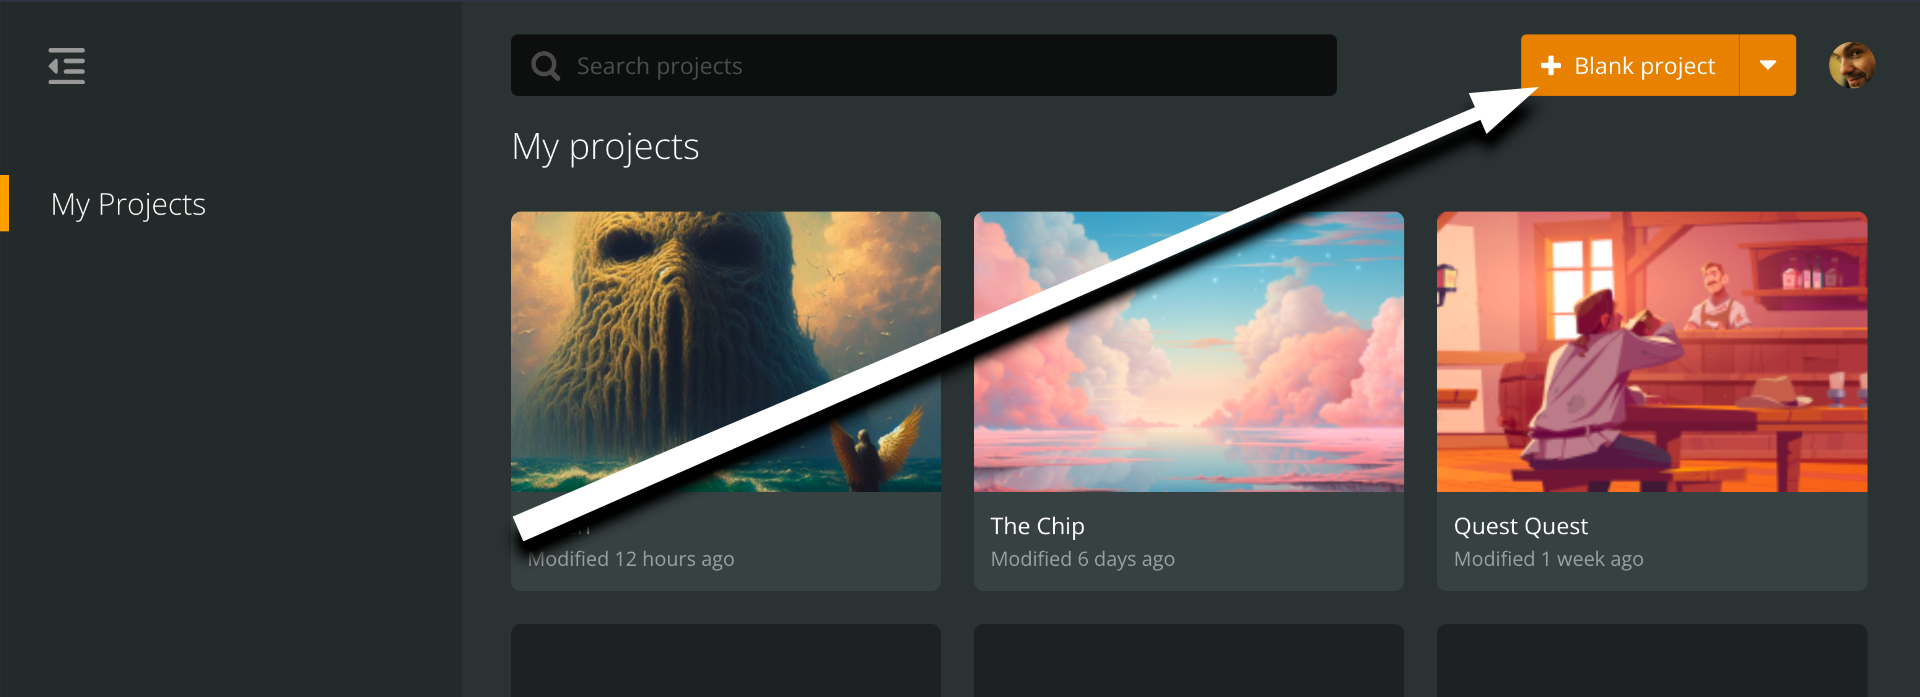
Create a new project
From the My Project page, click the Blank Project button, at the top left.
Rename the project by clicking the Untitled project field, at the top left. Name it Red Riding Hood’s Mum.
Let’s create a short scenario with a few scenes and two endings—a good and a bad one.
Mind your boards
In this short example, we’ll only use one board, to quickly put down the scenario’s synopsis.
When you start writing the scenes and dialogues, though, I advise you to use multiple boards—one for each scene or dialogue tree—and keep them in folders, to keep your work organised and readable. This is a good habit to develop from Day One.
Add & connect elements
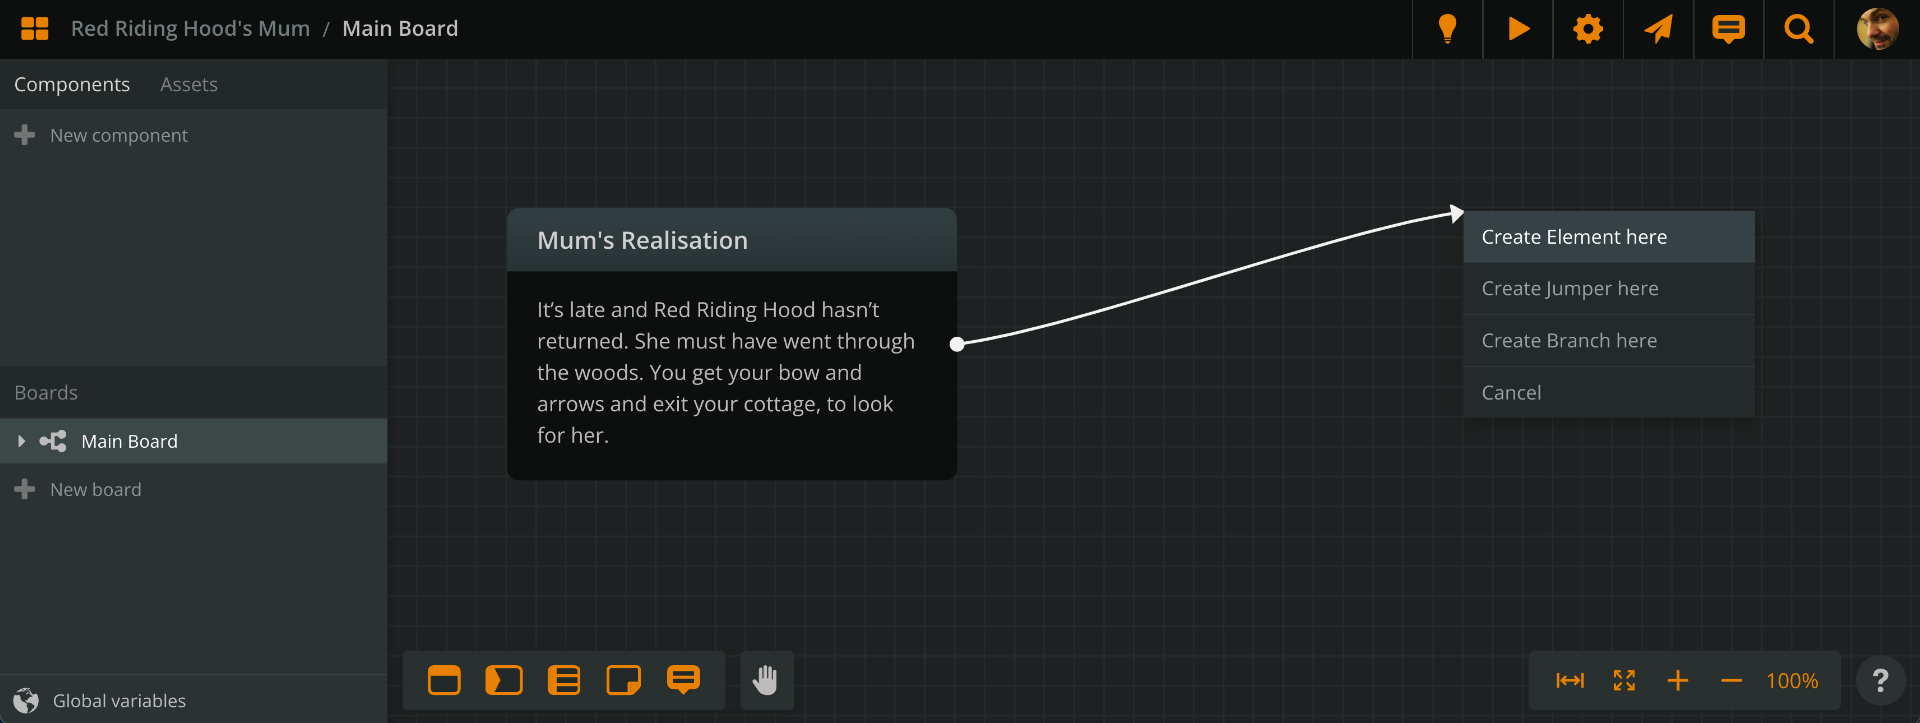
Double click anywhere inside your board, to create an element.
Double click its title and rename it to Mum’s realisation. Press TAB, to edit the element’s contents and type something along the lines of: It’s late and Red Riding Hood hasn’t returned. She must have went through the woods. You get your bow and arrows and exit your cottage, to look for her.
From the element’s edge, drag a connection and drop it on an empty area of the board. From the popup menu, choose Create Element here.
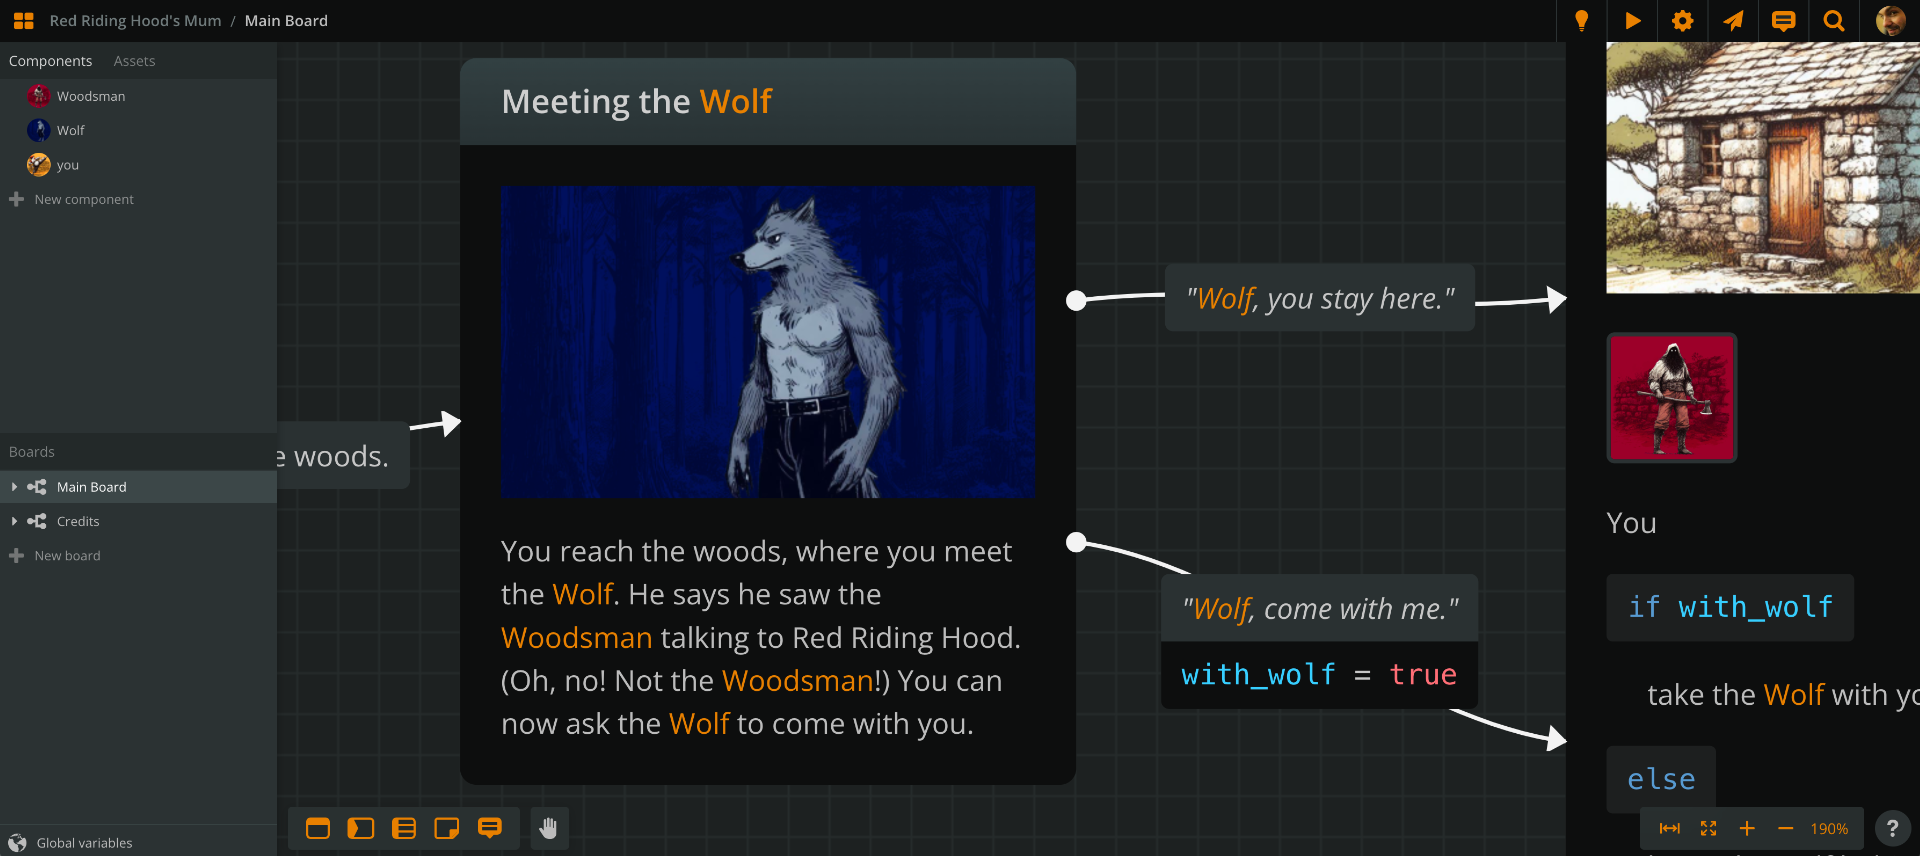
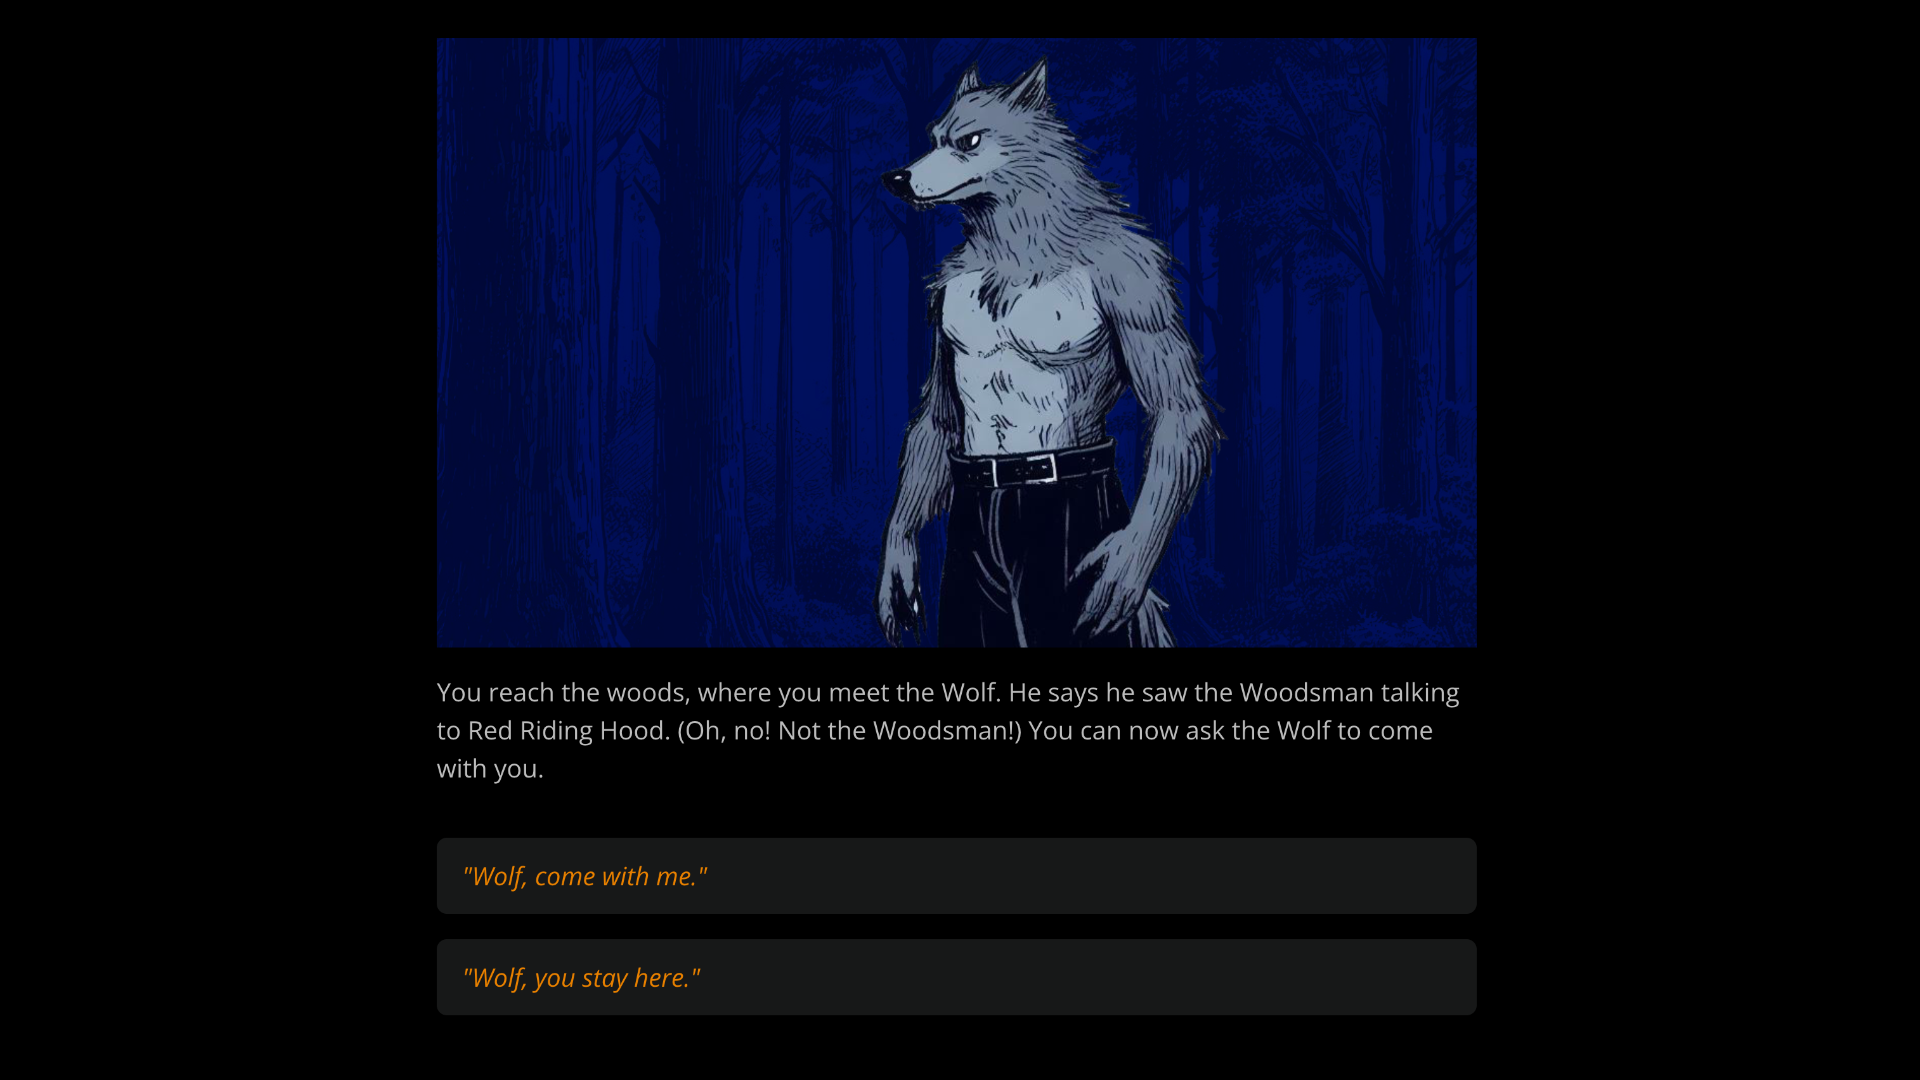
Give it a title, Meeting the Wolf, and some content: You reach the woods, where you meet the wolf. He says he saw the Woodsman talking to Red Riding Hood. (Oh, no! Not the Woodsman!) You can now ask the wolf to come with you.
Finally, create a label for the connection: double click the connection and type Go to the woods.
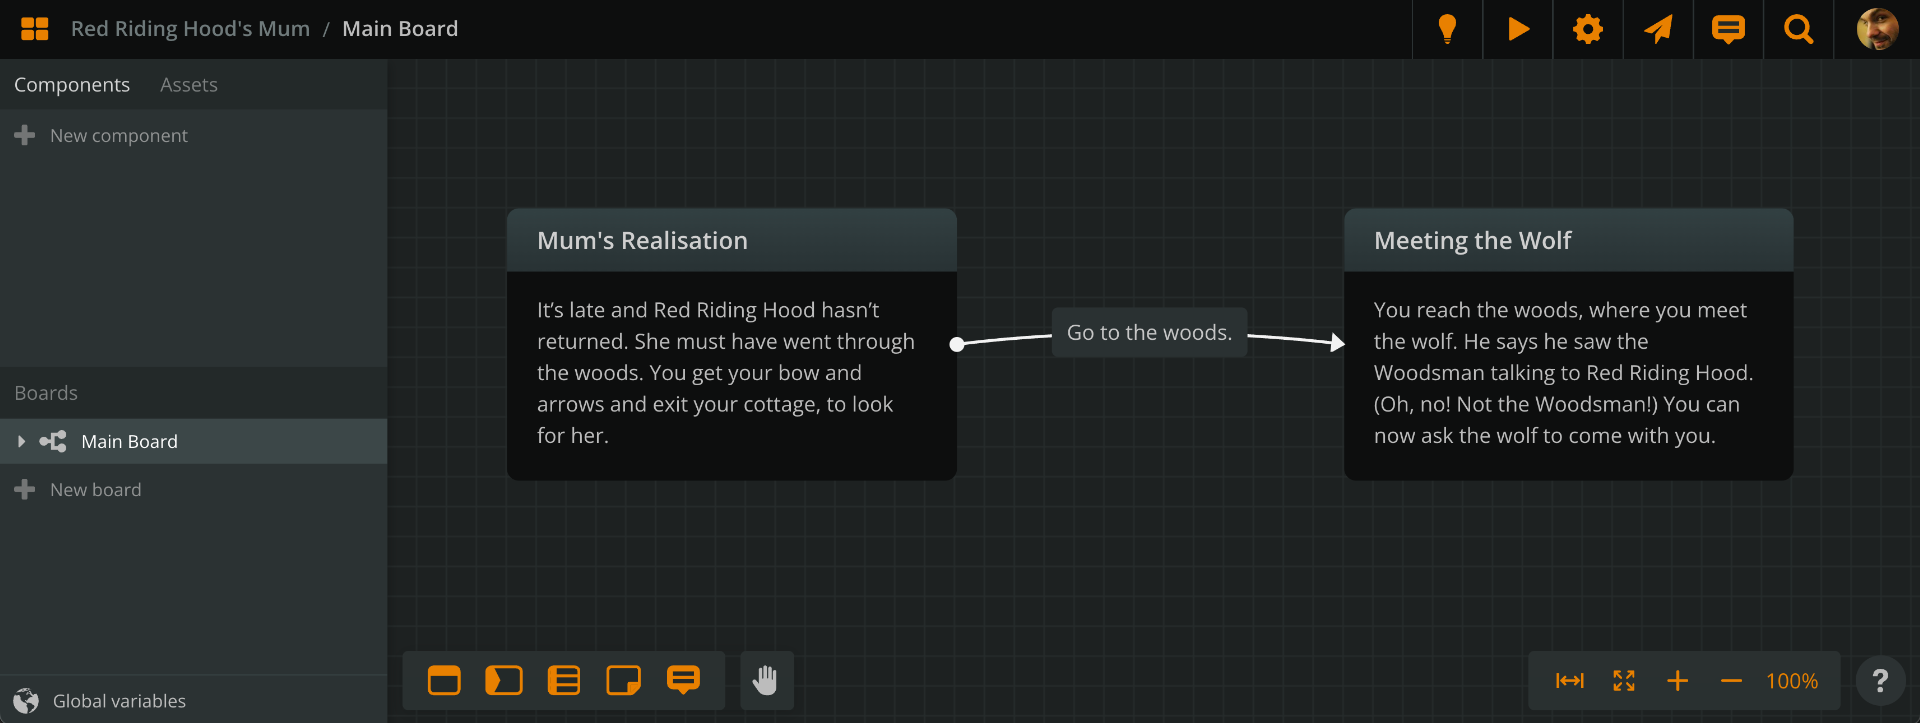
This label will appear as option text, when you run the story in Play Mode.
Adding a variable
Let’s now say we want Mum to choose whether she’ll leave the wolf there, or take him with her, for help. And we want the story to remember this choice.
To store such pieces of information, we can use Arcweave’s Global variables. Feel free to read more on Arcscript and variables, later.
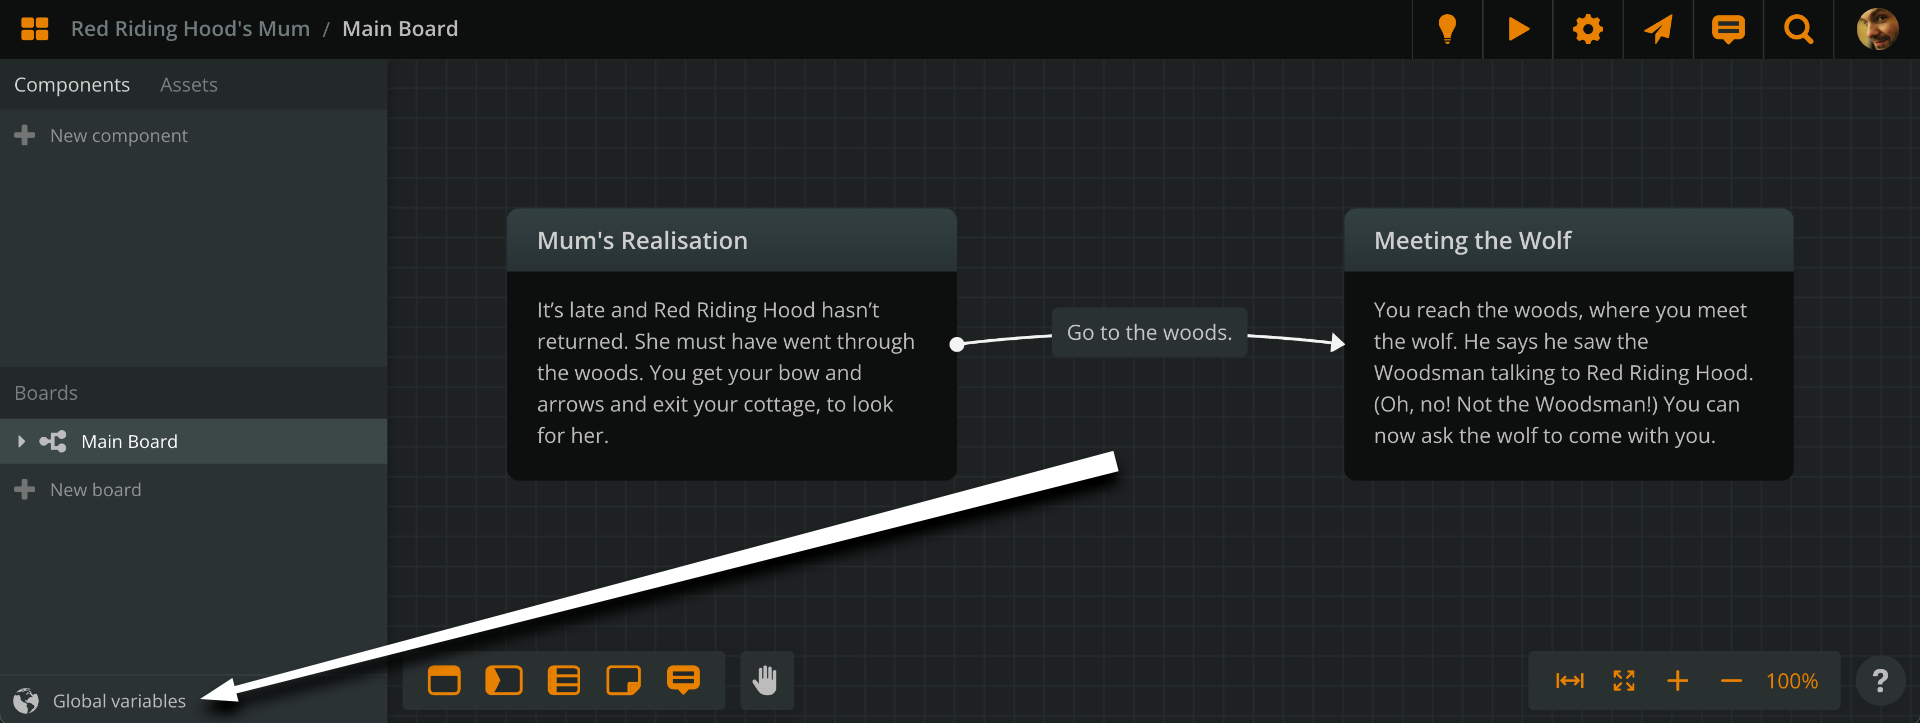
For now, all you need to do is click the Global variables button, at the bottom left, to open the variables list.
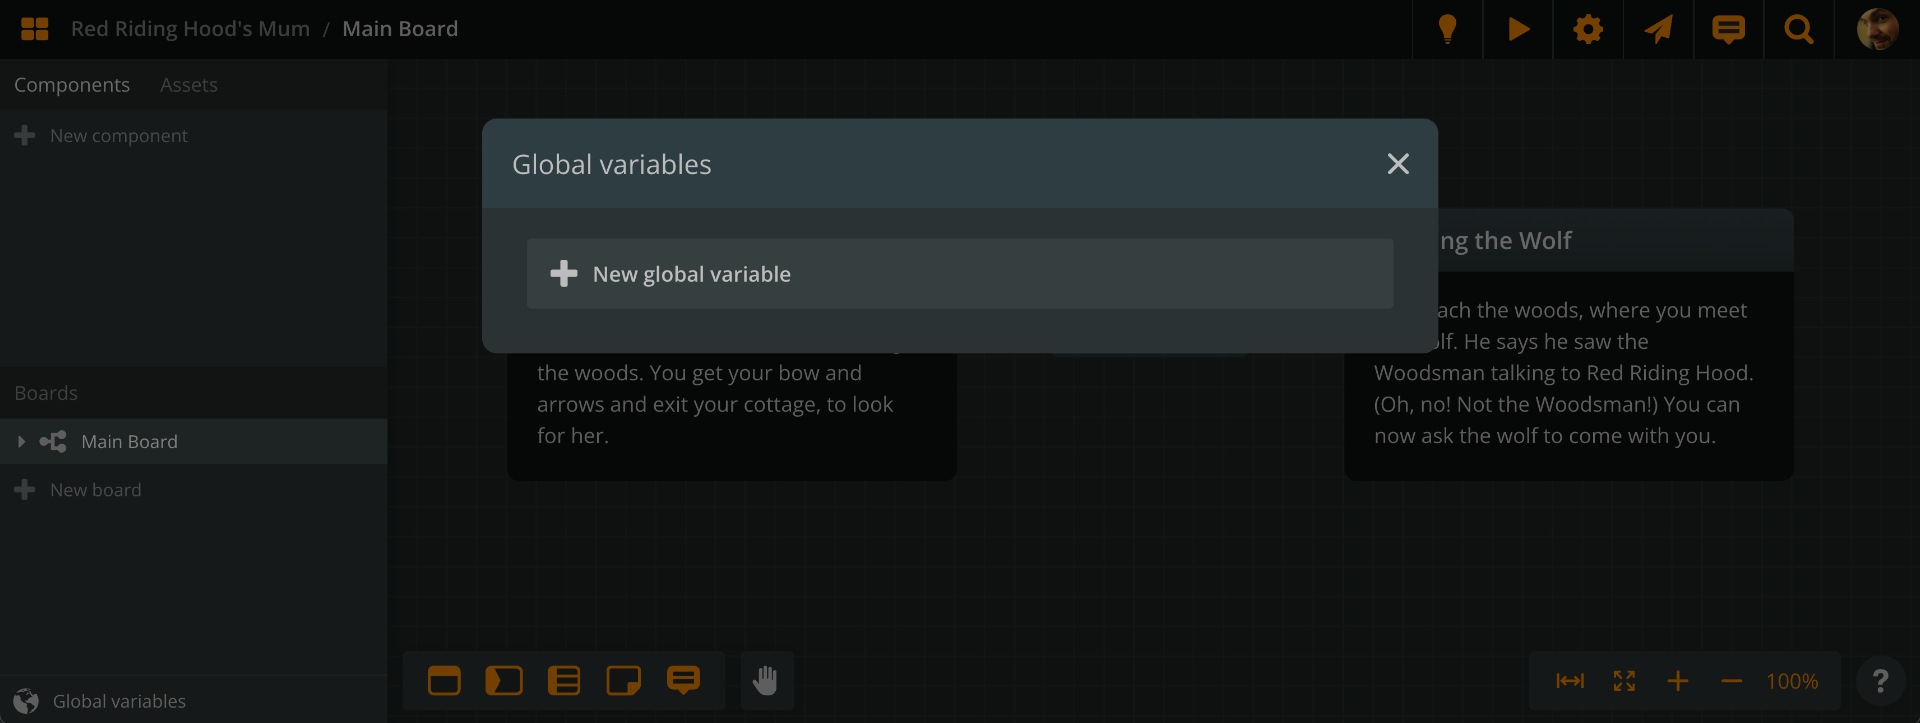
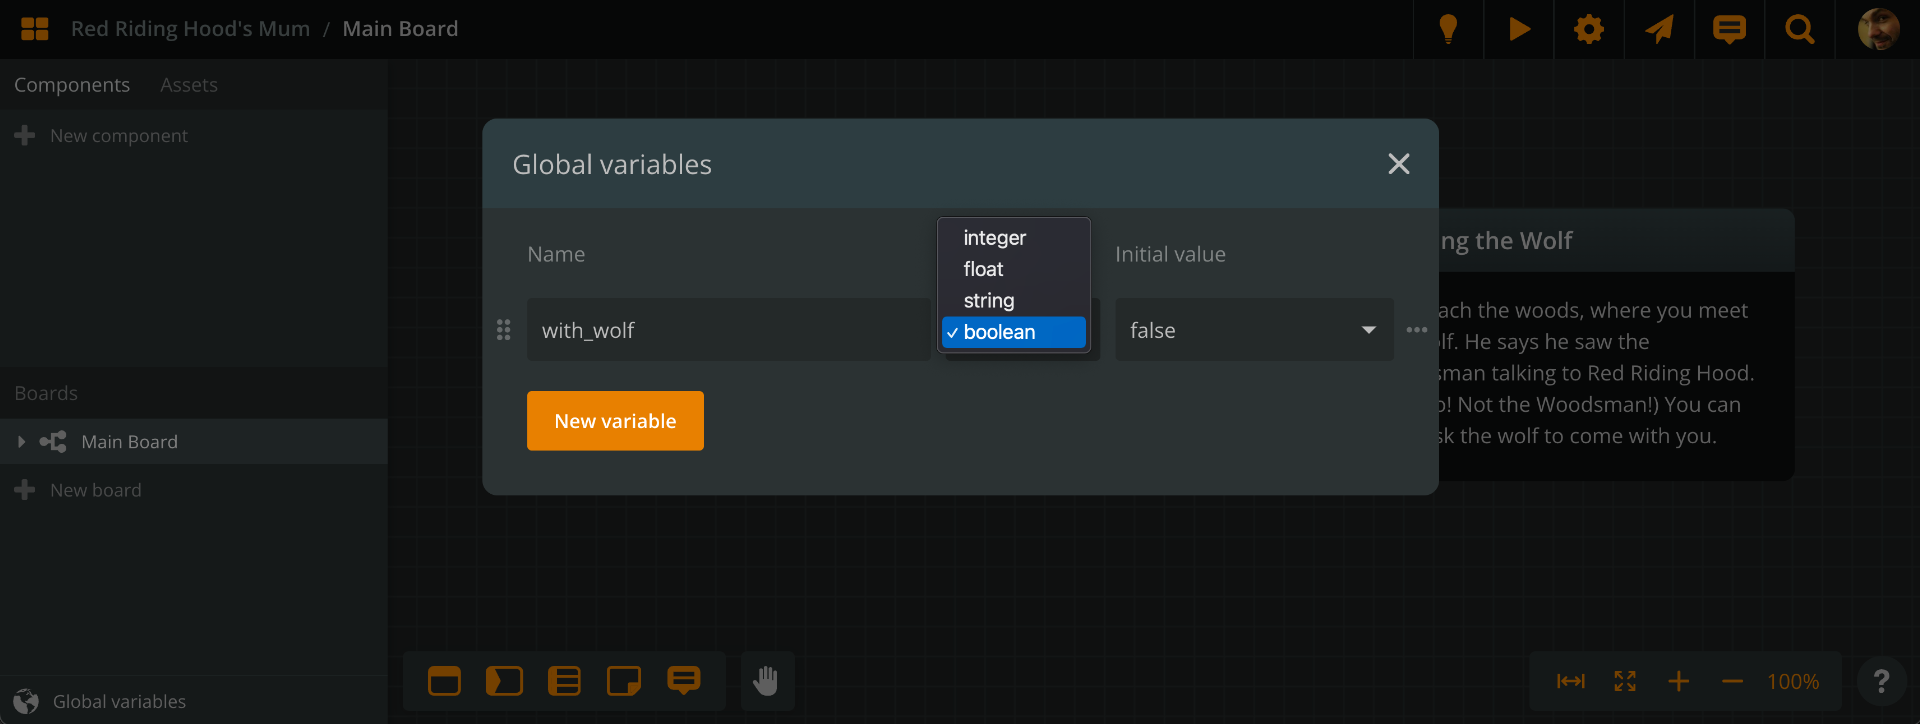
Click New variable. Give it a name: with_wolf and set its type: boolean. Leave its initial value as is: false.
Now let’s see what we can do with it.
Adding arcscript segments
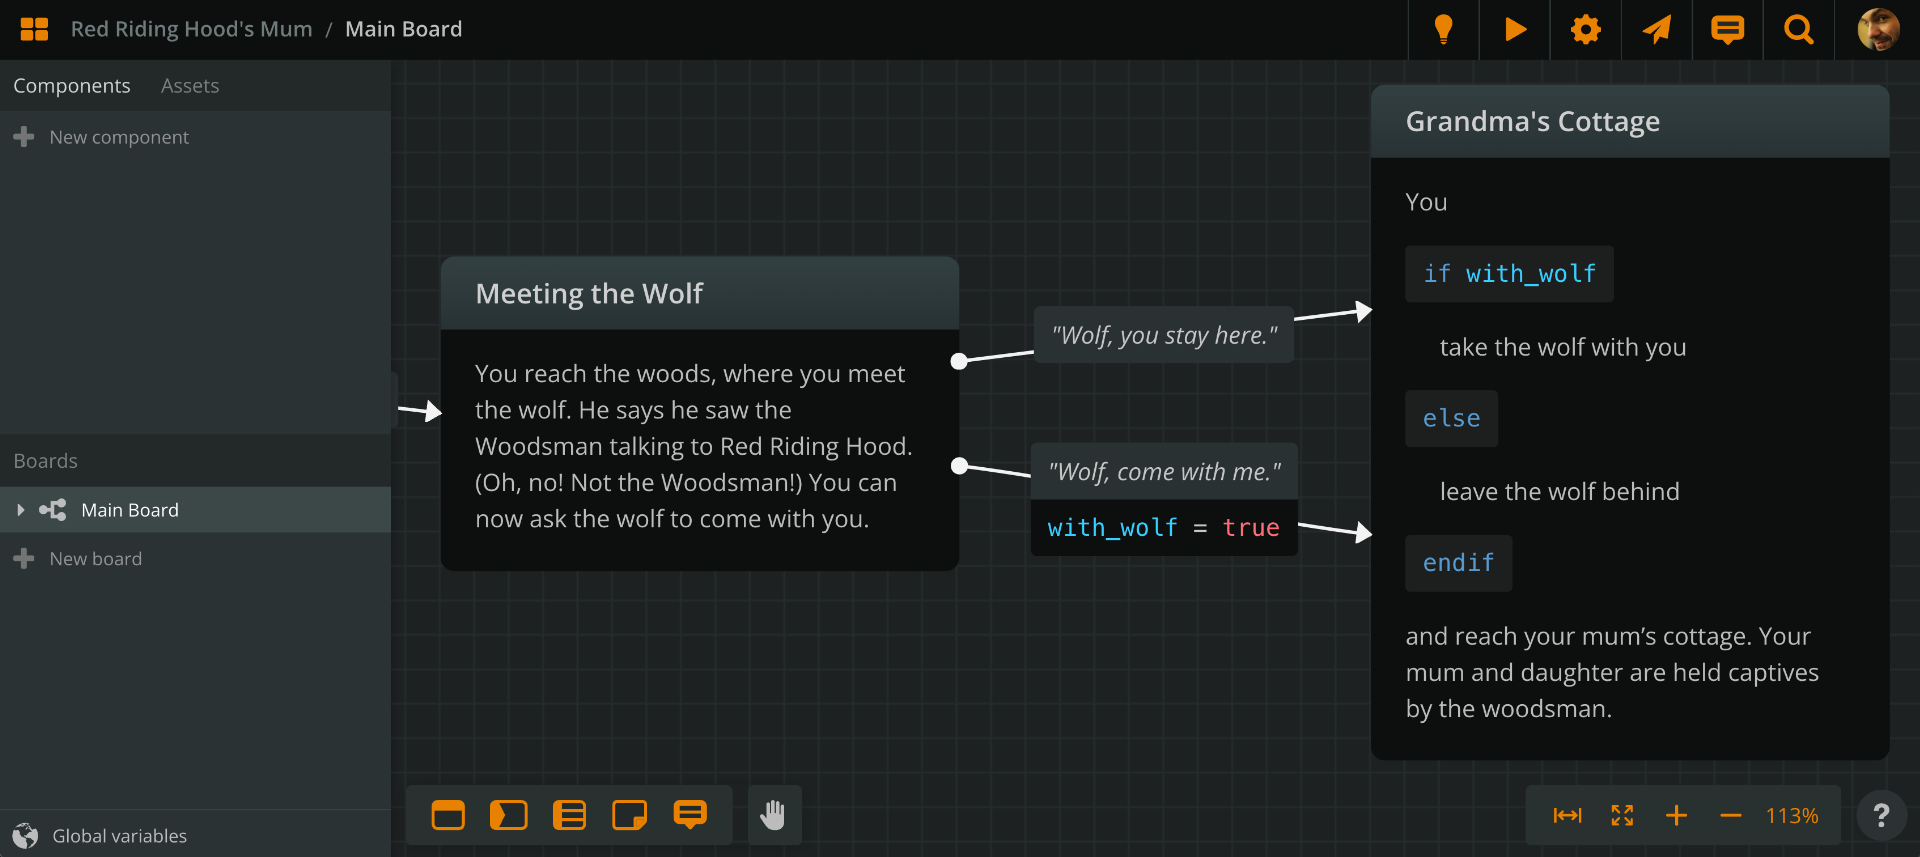
Create another element, after Meeting the Wolf, and title it Grandma’s Cottage. Type its content: You take the wolf with you / You leave the wolf behind and you reach your mum’s cottage, where the Woodsman holds her and your daughter captives. This doesn’t make sense, yet, but we’ll fix it asap.
Then, connect Meeting the Wolf with Grandma’s Cottage with two parallel connections.
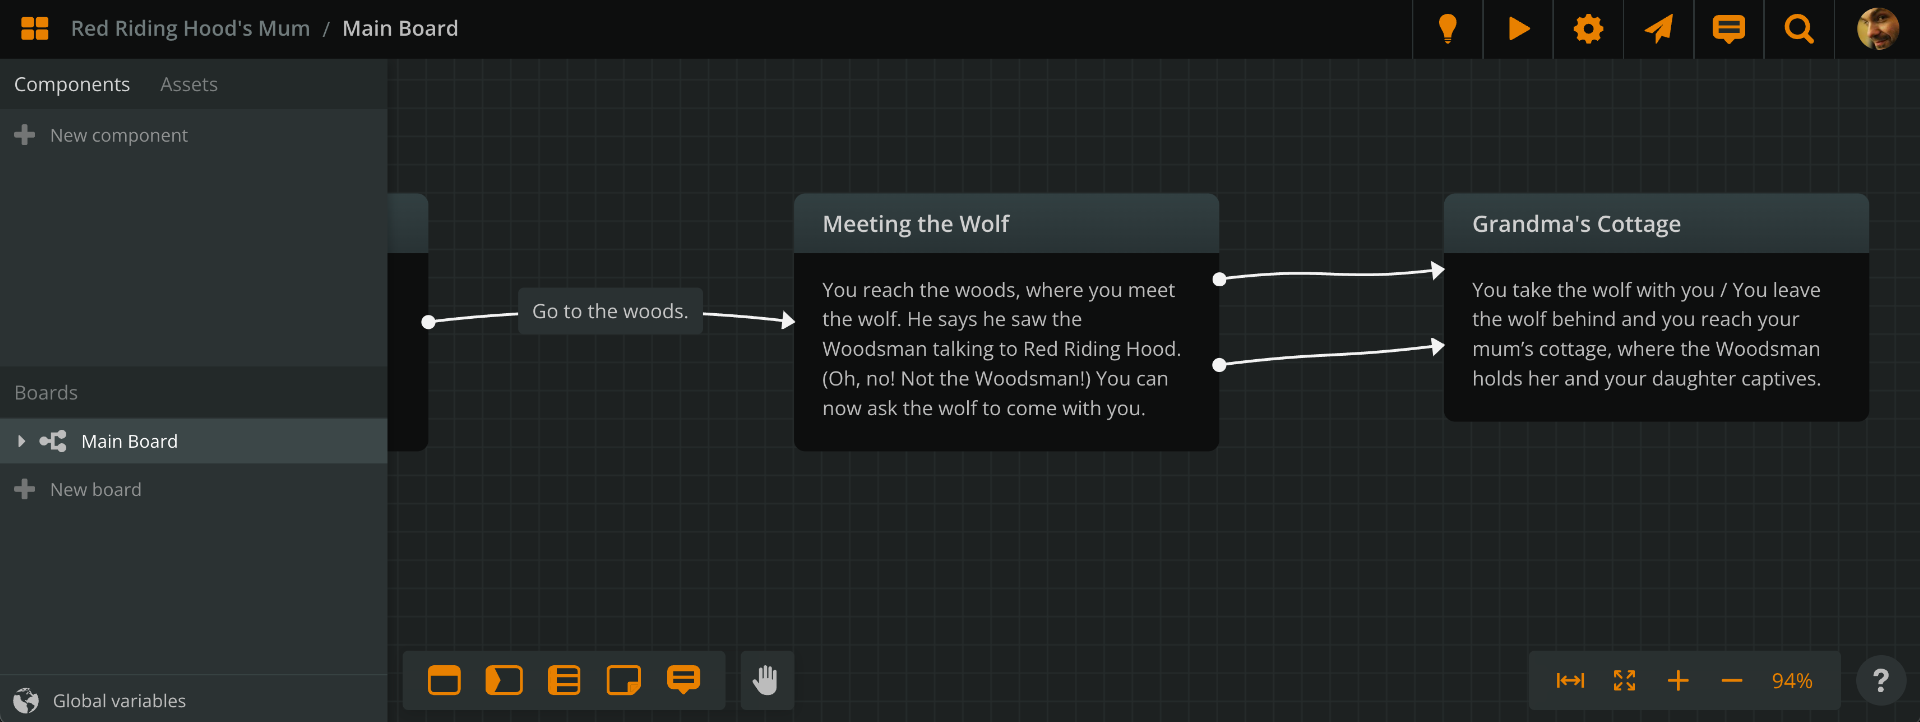
“Wait, what? Two options leading to the same element? What’s the point of that?” I hear you ask.
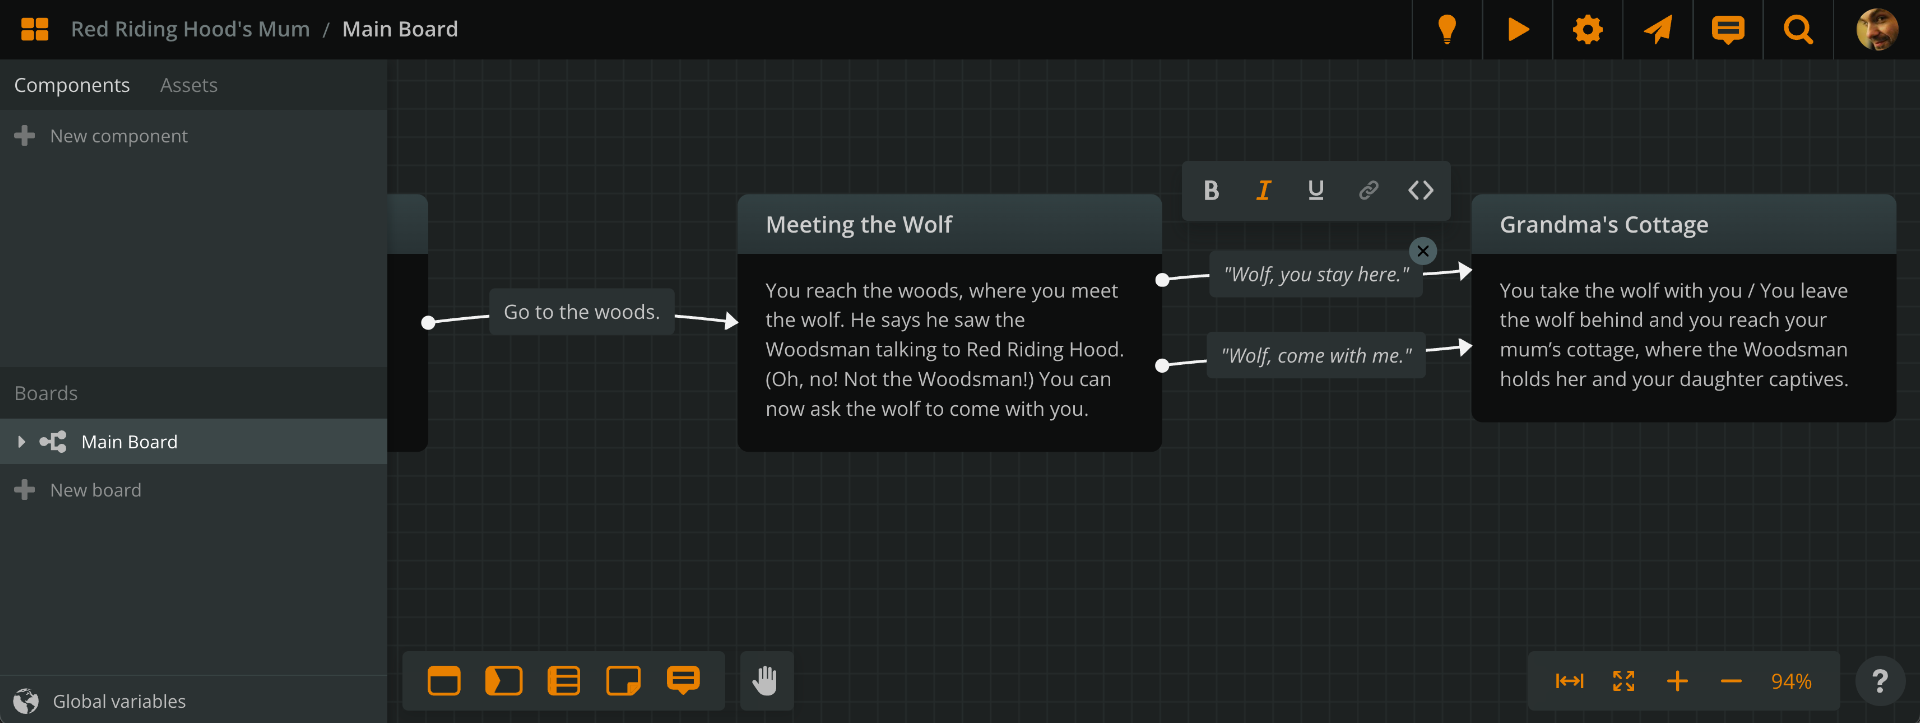
Well, we’re not done, yet. Create a label for each of the two connections: “Wolf, you stay here…” and “Wolf, come with me…”
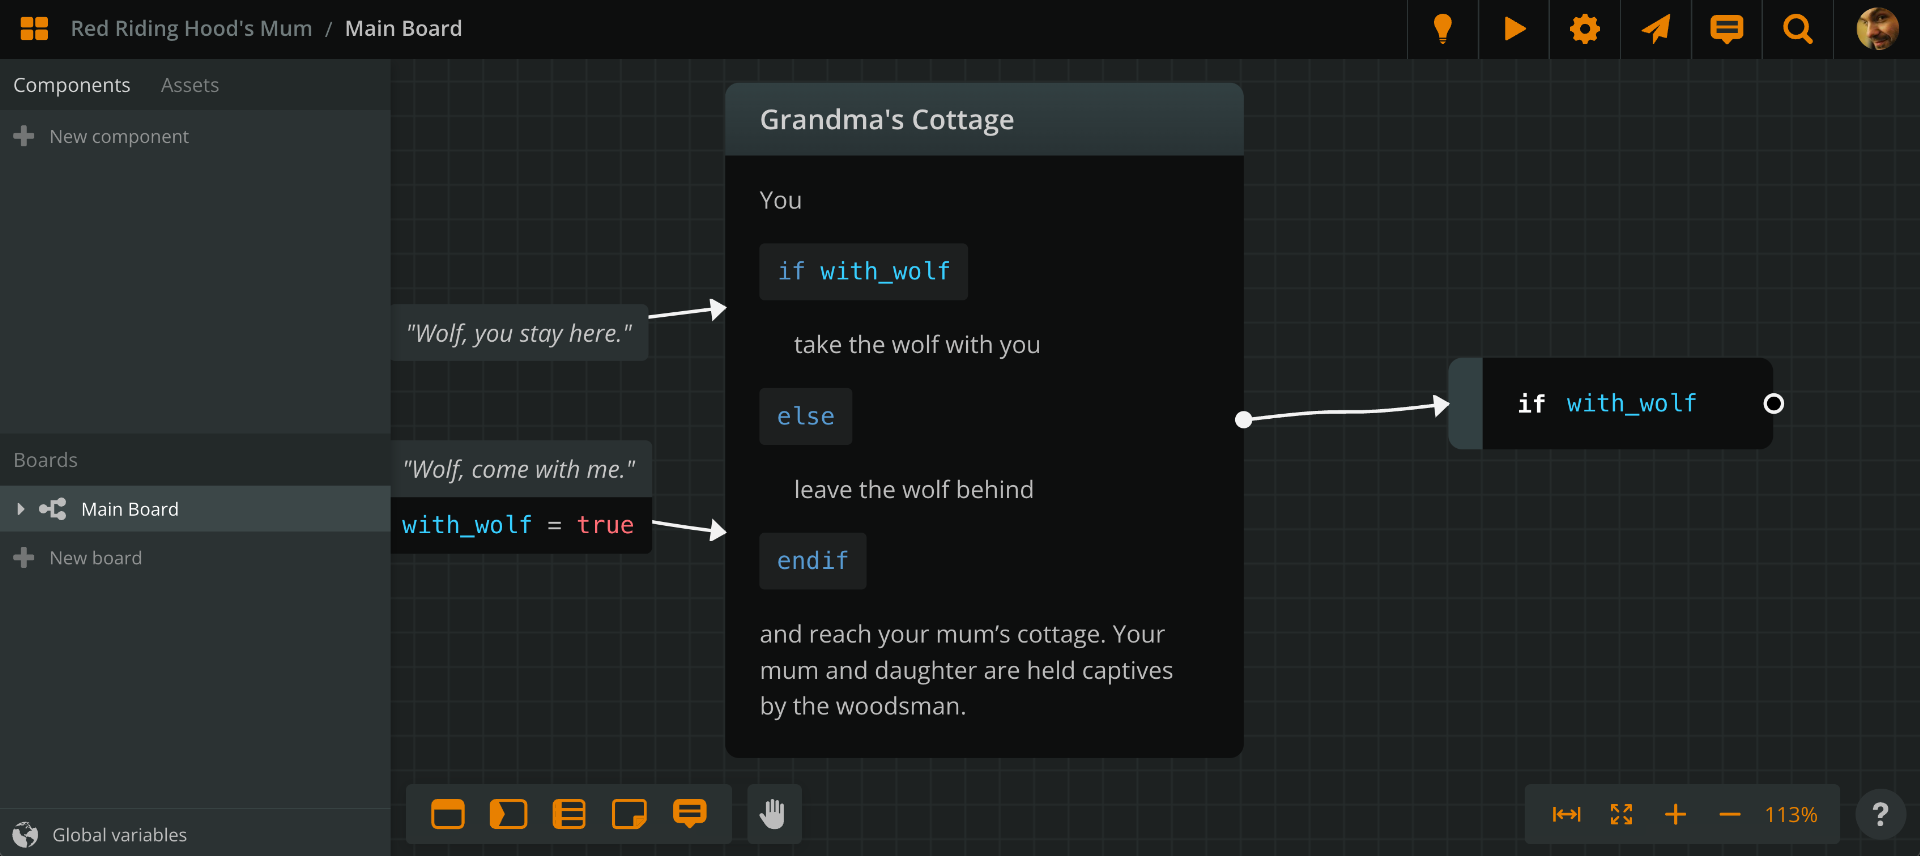
Now, we want the story to register that the second option makes the wolf join Mum. In other words, we need to change the with_wolf variable from false to true.
For this, we’ll use Arcweave’s scripting language, arcscript.
After typing the label “Wolf, come with me, ” hit RETURN, to create a second line for the label’s text. Then, make this line an arcscript segment, by clicking on the arcscript segment icon on the formatting bar (the one symbolised by <>) or hitting Ctr+Shift+C or Cmd+Shift+C.
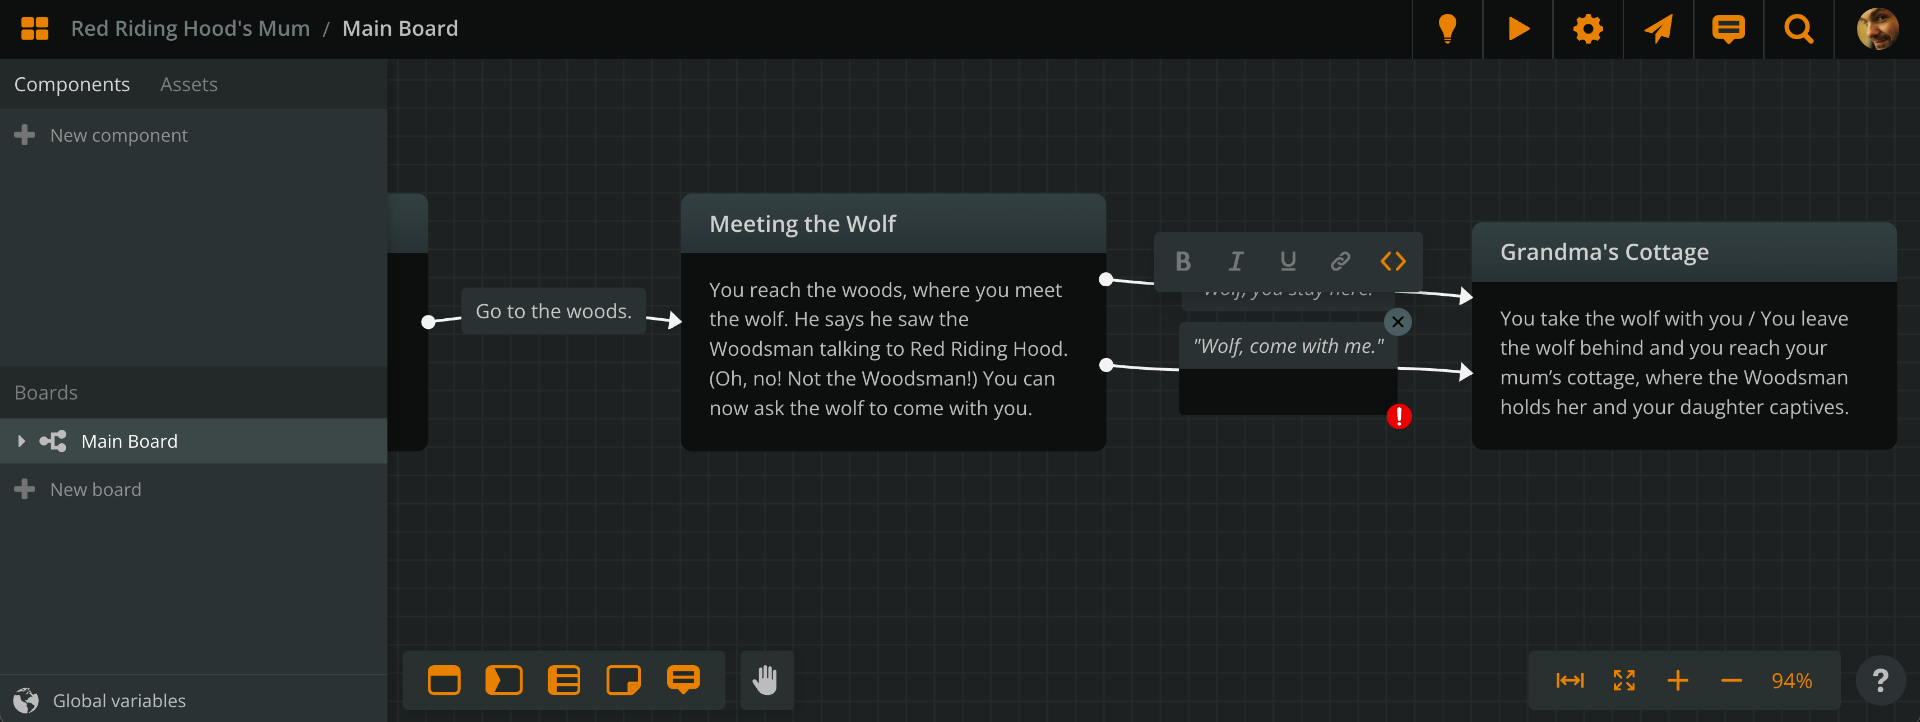
In the segment, type:
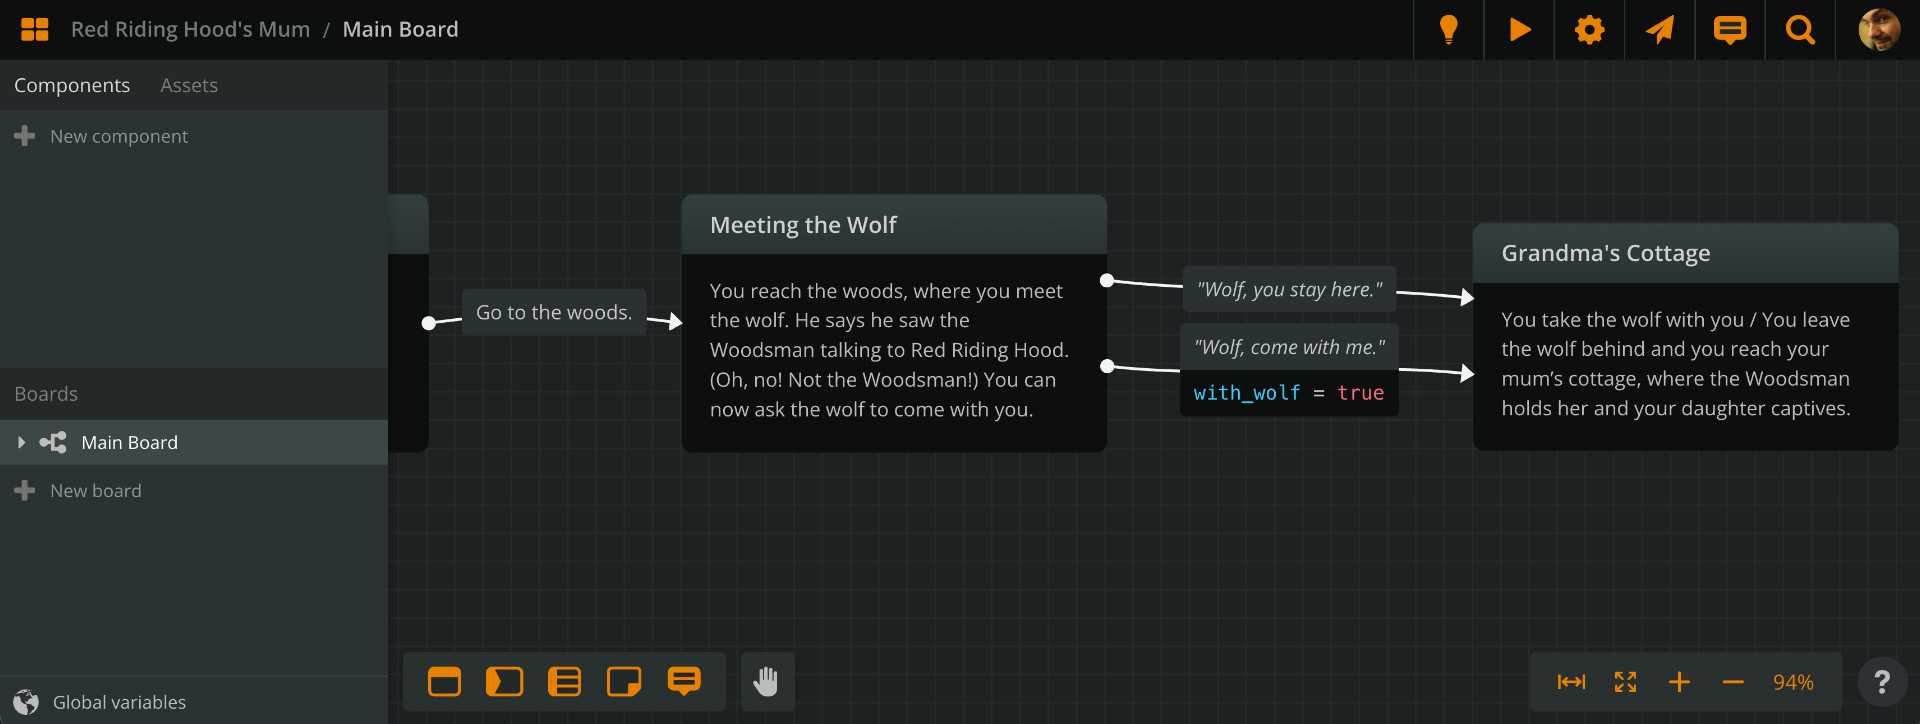
with_wolf = true
This changes the variable’s value from false to true.
Now, let’s fix the element’s self-contradicting content. We want the story to render the correct sentence, depending on the value of with_wolf. Again, arcscript to the rescue.
Edit the element’s content, alternating normal text with arcscript code segments, so it looks like this:
You
if with_wolf
take the wolf with you
else
leave the wolf behind
endif
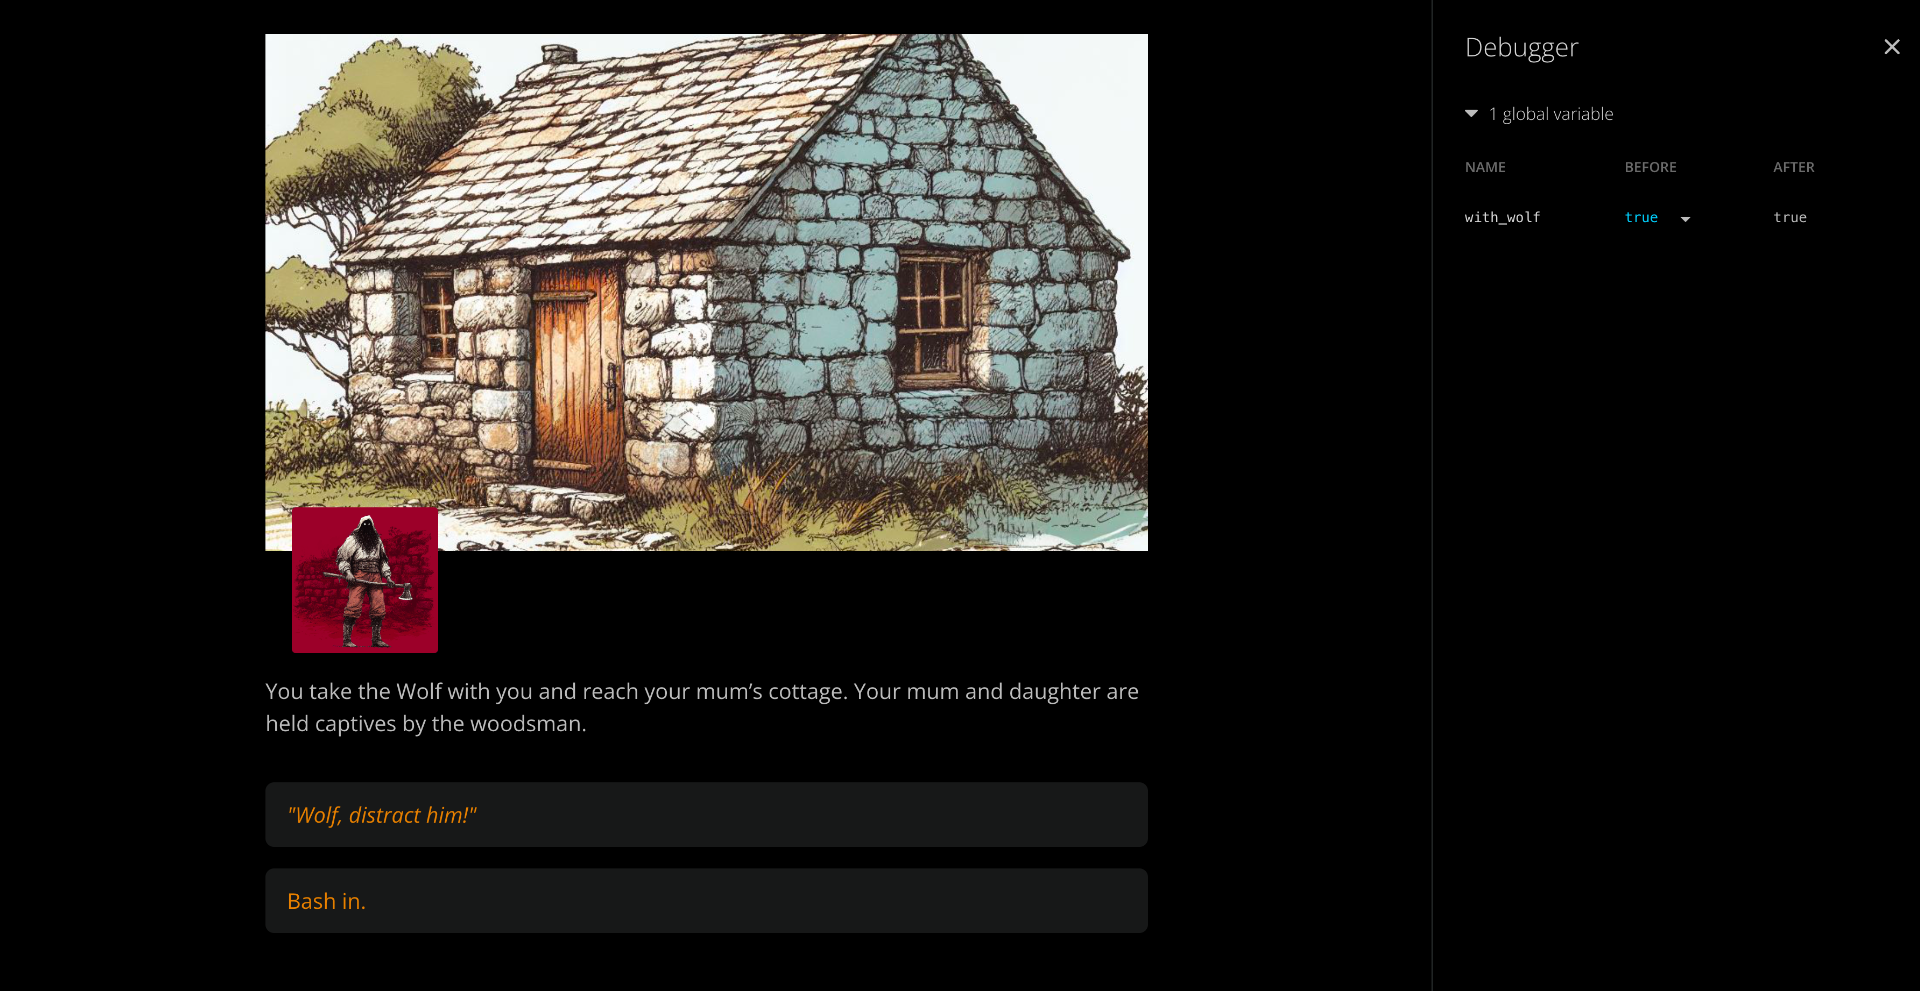
and reach your mum's cottage. Your mum and daughter are held captives by the woodsman.
Adding a branch
A branch is an item that checks one or more conditions, renders the appropriate connections, and directs the story flow accordingly. You can dig deeper in branches on your own time, but now let’s see a simple use.
From Mum’s Cottage, drag a connection and Create Branch here. For its condition, next to the word if, just type with_wolf:
if with_wolf
From the branch’s output, drag a connection and Create Element here. Title it Good Ending. Label the connection: “Wolf, distract him!” and give the element some content: The wolf runs behind the cottage and howls. This distracts the woodsman and you sneak in and untie your family. But now you must deal with the woodsman returning. To be continued..."
You can even change the element's colour to green, to emphasise the positive ending, if you like. Right click on the element and pick the green colour.
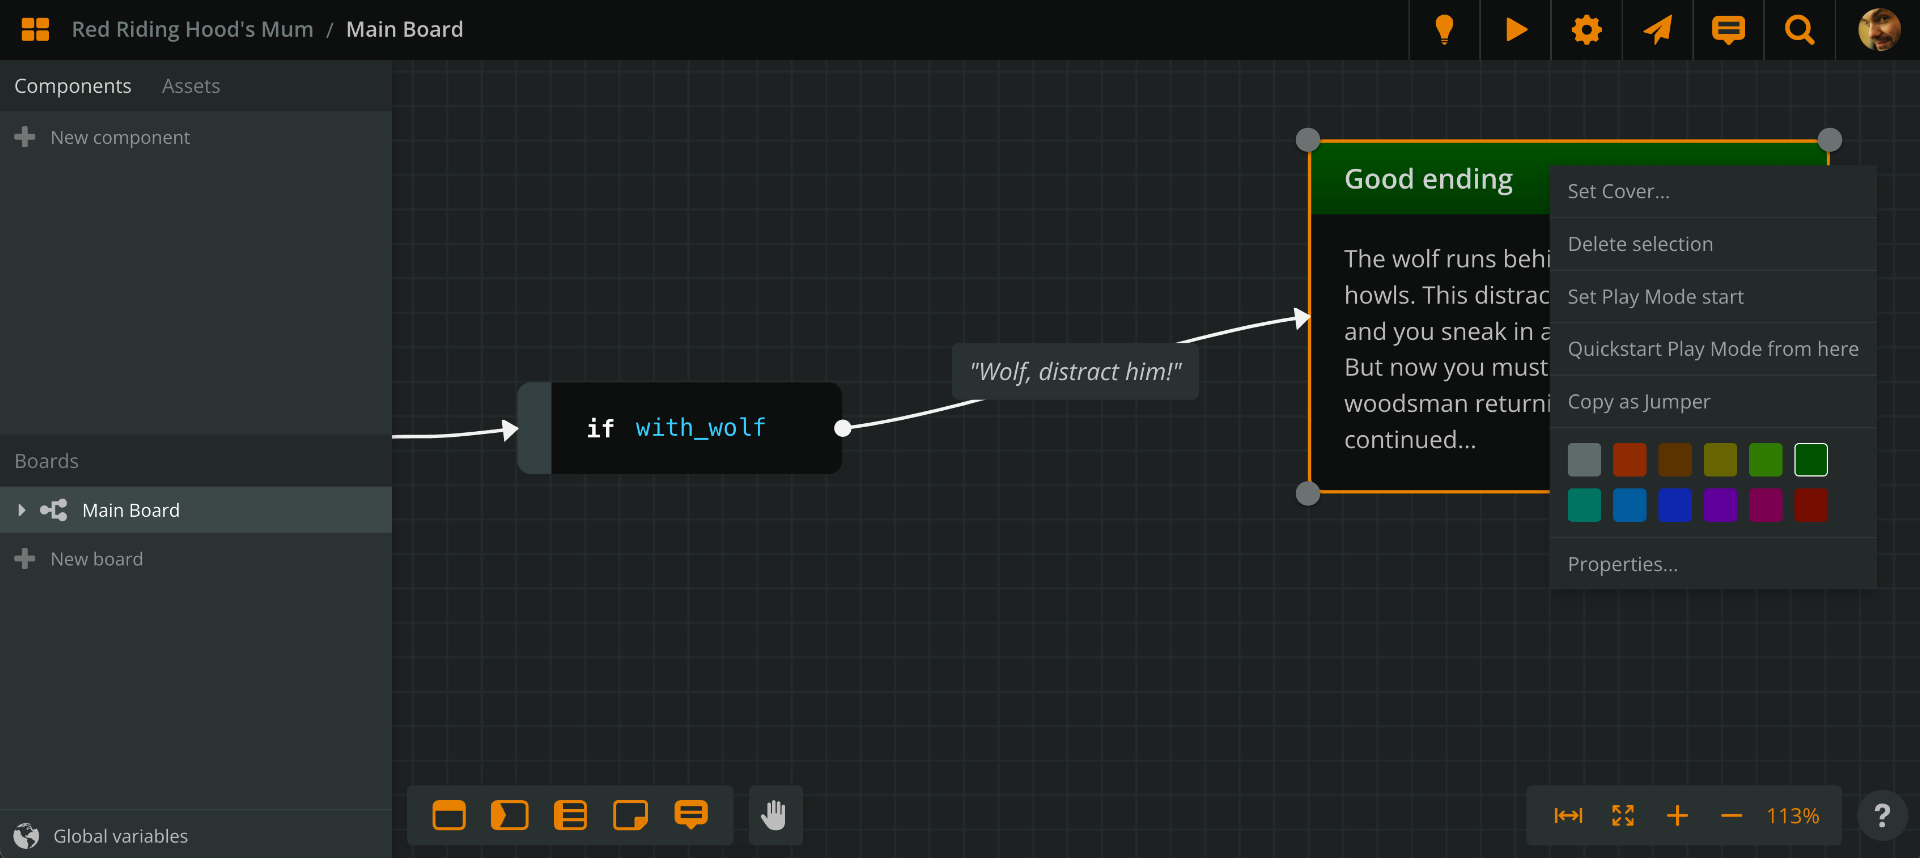
Now, here is how this branch works: if the branch’s condition is true, the flow continues. In our case, if the wolf is with the player (with_wolf is true), there will be a connection leading to the Good Ending. If not, this connection simply won’t present any player option.
To complete the scenario, add another element titled Bad Ending and connect Mum’s Cottage with it. Label the connection: Bash in and add the content: Without a second thought, you kick the door in and bash in the cottage. Too bad: the woodsman is expecting you with his axe ready. To be continued...
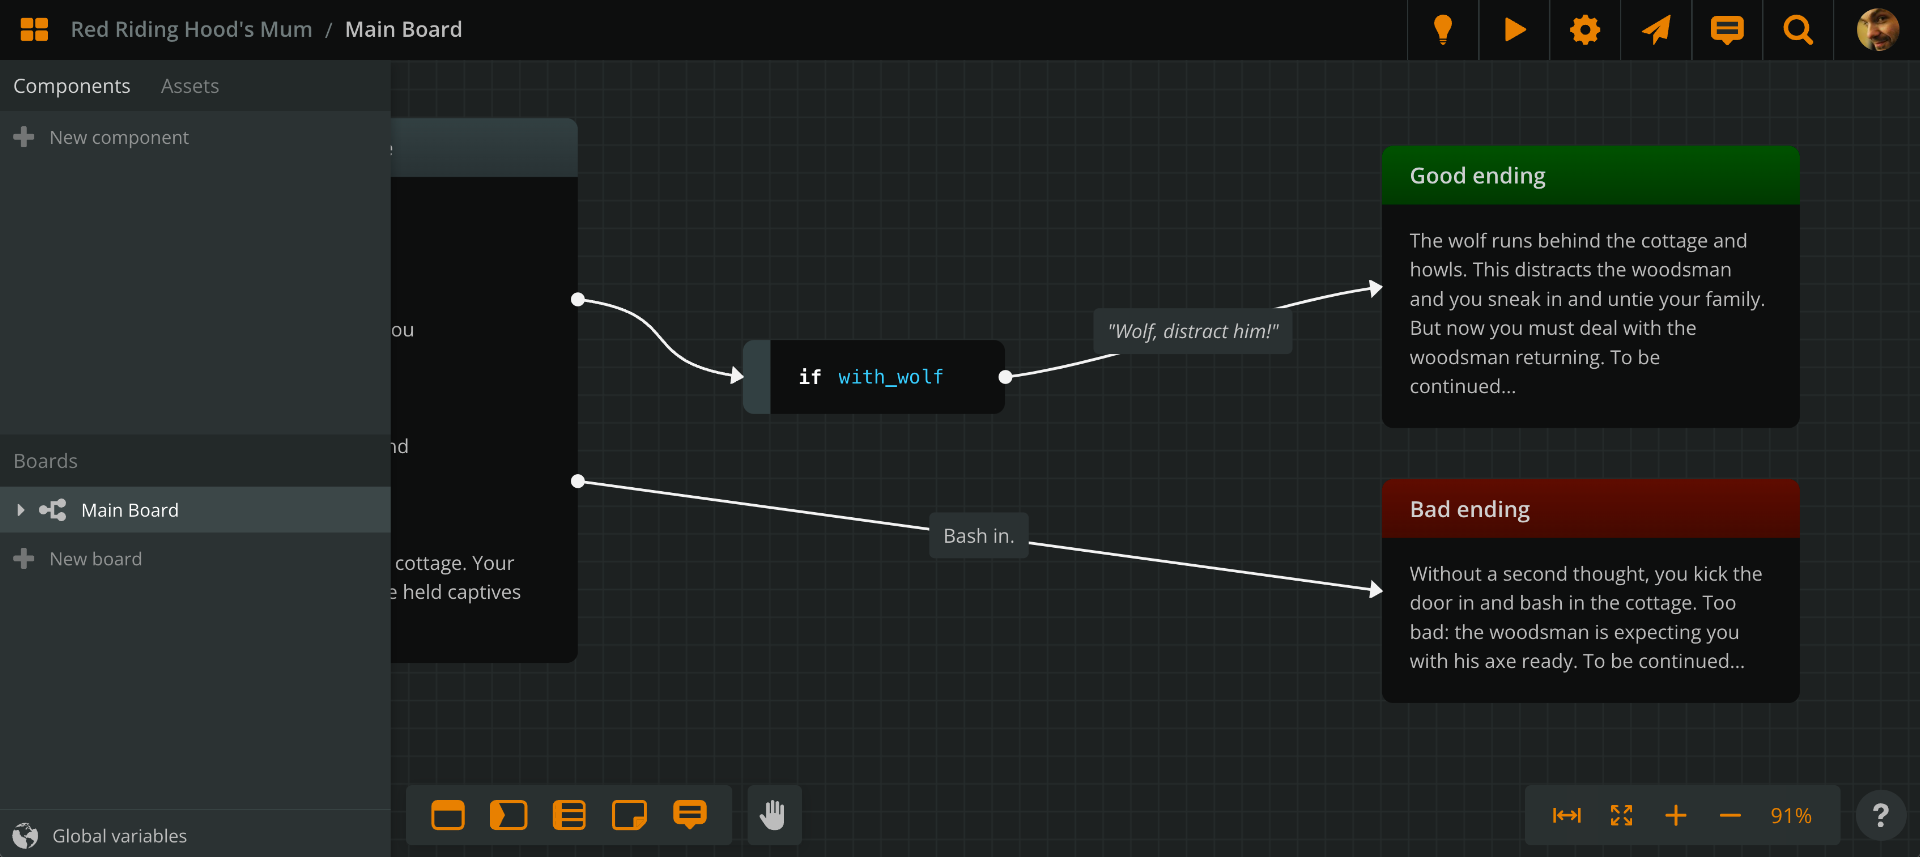
Note: the option to bash in will always be available, since it’s not a conditional one. On the contrary, the option to send the wolf as a distraction will only be available if the wolf is around, due to the branch involved.
Playtest in Play Mode
Start Play Mode
Right-click your first element, Mum’s realisation, and choose Set Play Mode start. This lets Arcweave know that this is where it’s supposed to begin the story.
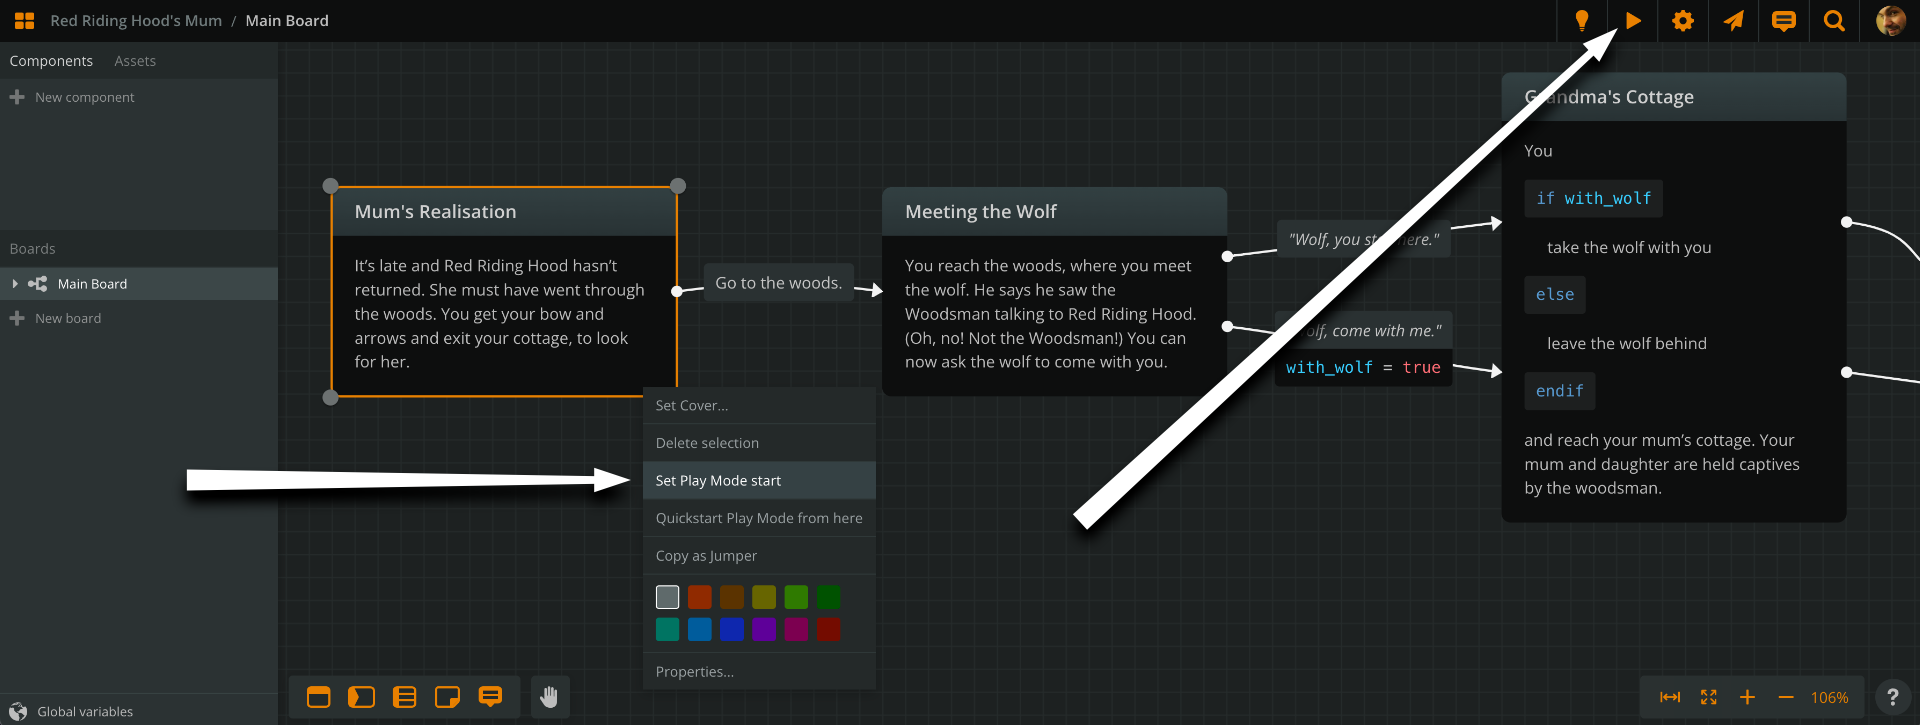
Now, click the Play button, at the top right. A new browser tab opens in Arcweave’s Play Mode, where you can playtest your story.
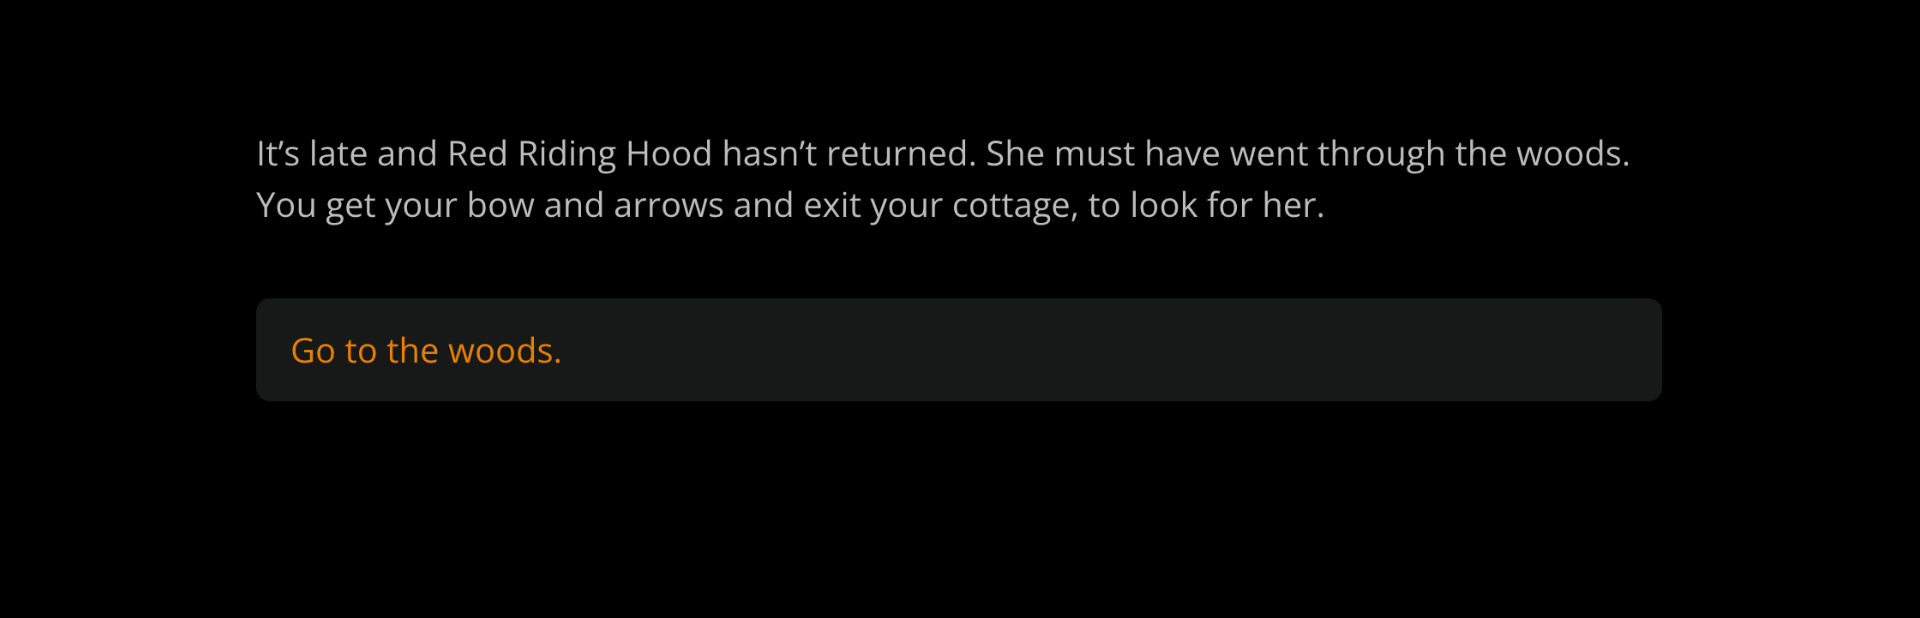
Play the scenario clicking on the option buttons, to proceed. Choose either to take or leave the wolf and see how the story reacts to that.
Restart the playthrough
Once you reach the end, click outside the story content to make the Play Mode menu appear. At the bottom left, you’ll see the Restart button.
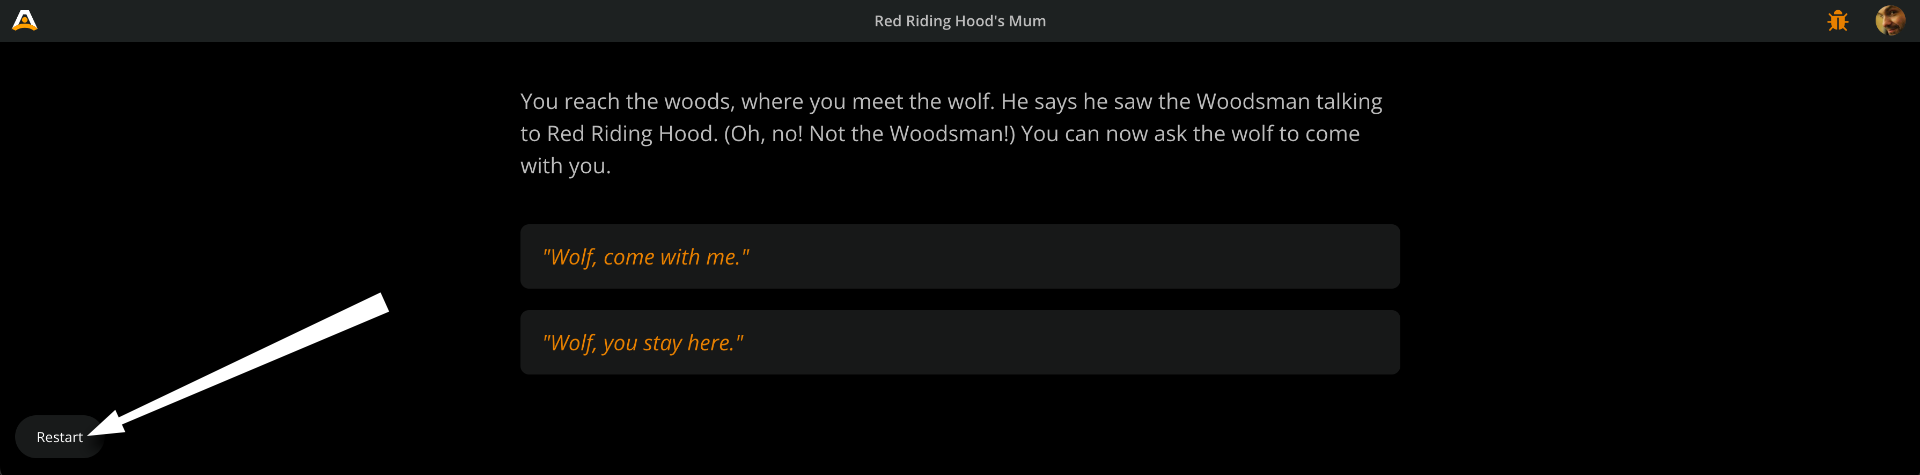
Click it and play again, choosing the other option, wolf-wise.
Open the Debugger
With the Play Mode menu visible, click on the orange bug icon, at the top right. This opens Arcweave’s Debugger.
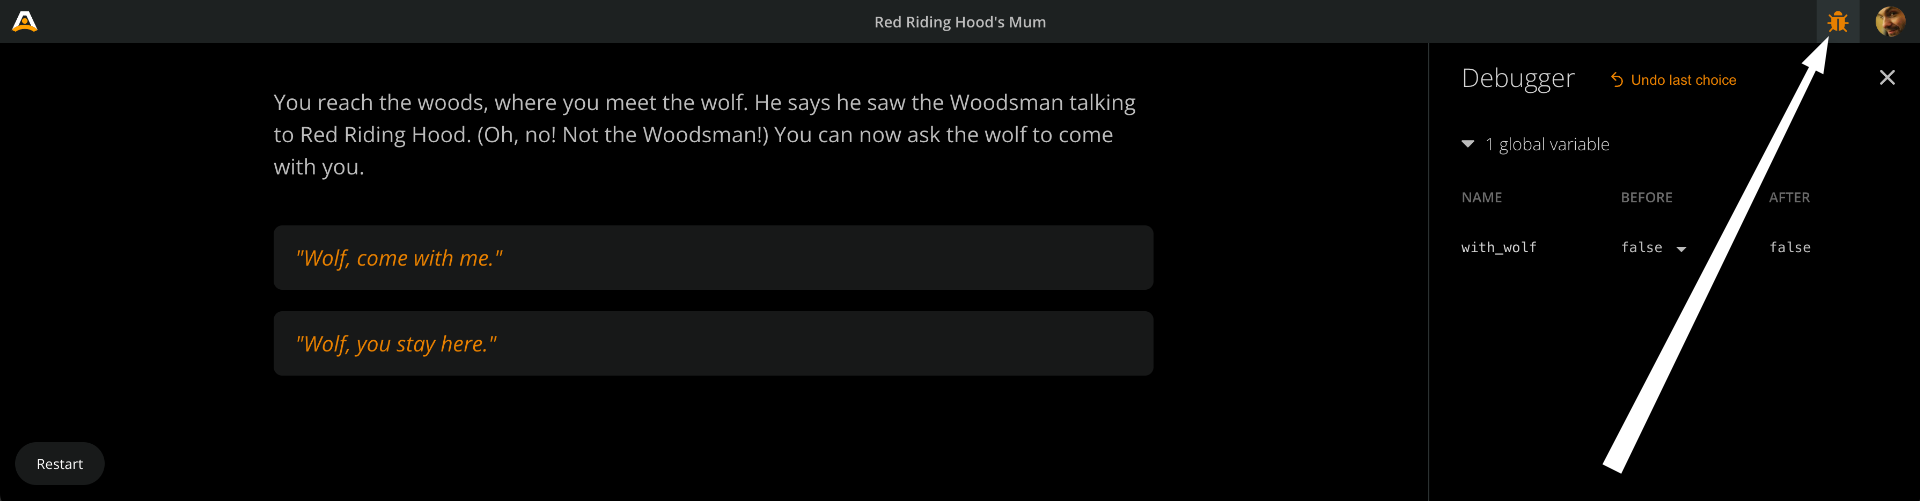
The Debugger provides a list of all your variables and their value before and after rendering the current element.
You can read more about the Debugger later. For now, play the story and see how the value of the with_wolf variable changes from false to true, when you ask the wolf to come with you.
Image and audio assets
This is the part where you make your story look and sound good, by adding images and audio.
You can read more about image and audio assets in Arcweave but, for now, we’ll only add a couple of images and a piece of music.
Add image & audio assets
Download this example project’s assets as a zip file, by clicking the button below.
Extract the zip file; it contains:
cottage.pngforest.pngmum-comp.pngwolf-comp.pngwolf.pngwoodsman-comp.pngmum_music_theme.ogg
Go to your Assets tab, at the top left and click the + icon. Then, upload the files.
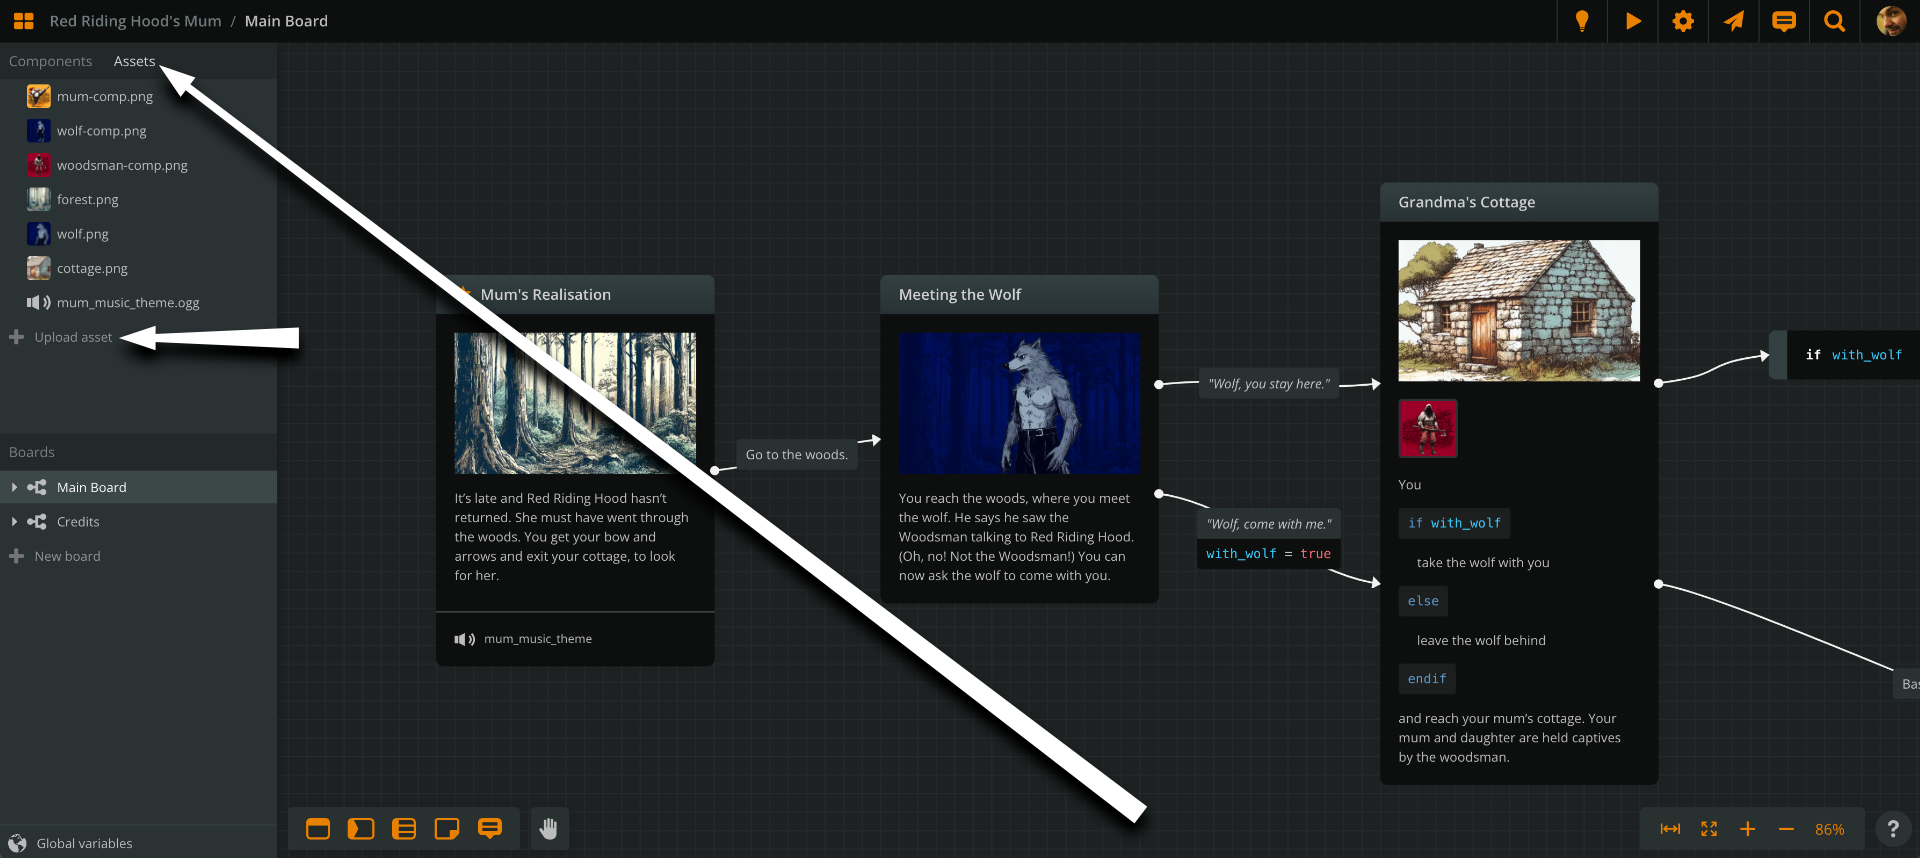
You can now use the images as element covers or component covers.
Notice the Credits board we've added, to credit the music composer and... well, Bing's Image Creator. Once our game is finished, we can add a Credits element, visible in Play Mode, as well.
Important: when using assets, make sure you have licence to do so and always credit the creator.
Set element cover
To set an asset as an element’s cover image, either:
- drag the asset from the sidebar and drop it into an element
or
- right-click the element
- Choose Set Cover
- choose from My Images, where your assets will be.
Element covers appear in Play Mode, as the element’s header image, above the content.
As an example, drag the forest.jpg into the Mum's Realisation element. Now, right-click the element and choose Quickstart Play Mode from here.

Attach audio clip to element
Now, let’s have a taste of how to use audio in Arcweave.
From the Assets tab, drag mum_music_theme.ogg and drop it into the first element. You’ll notice that the attached audio appears as a new addition, at the bottom of the element.
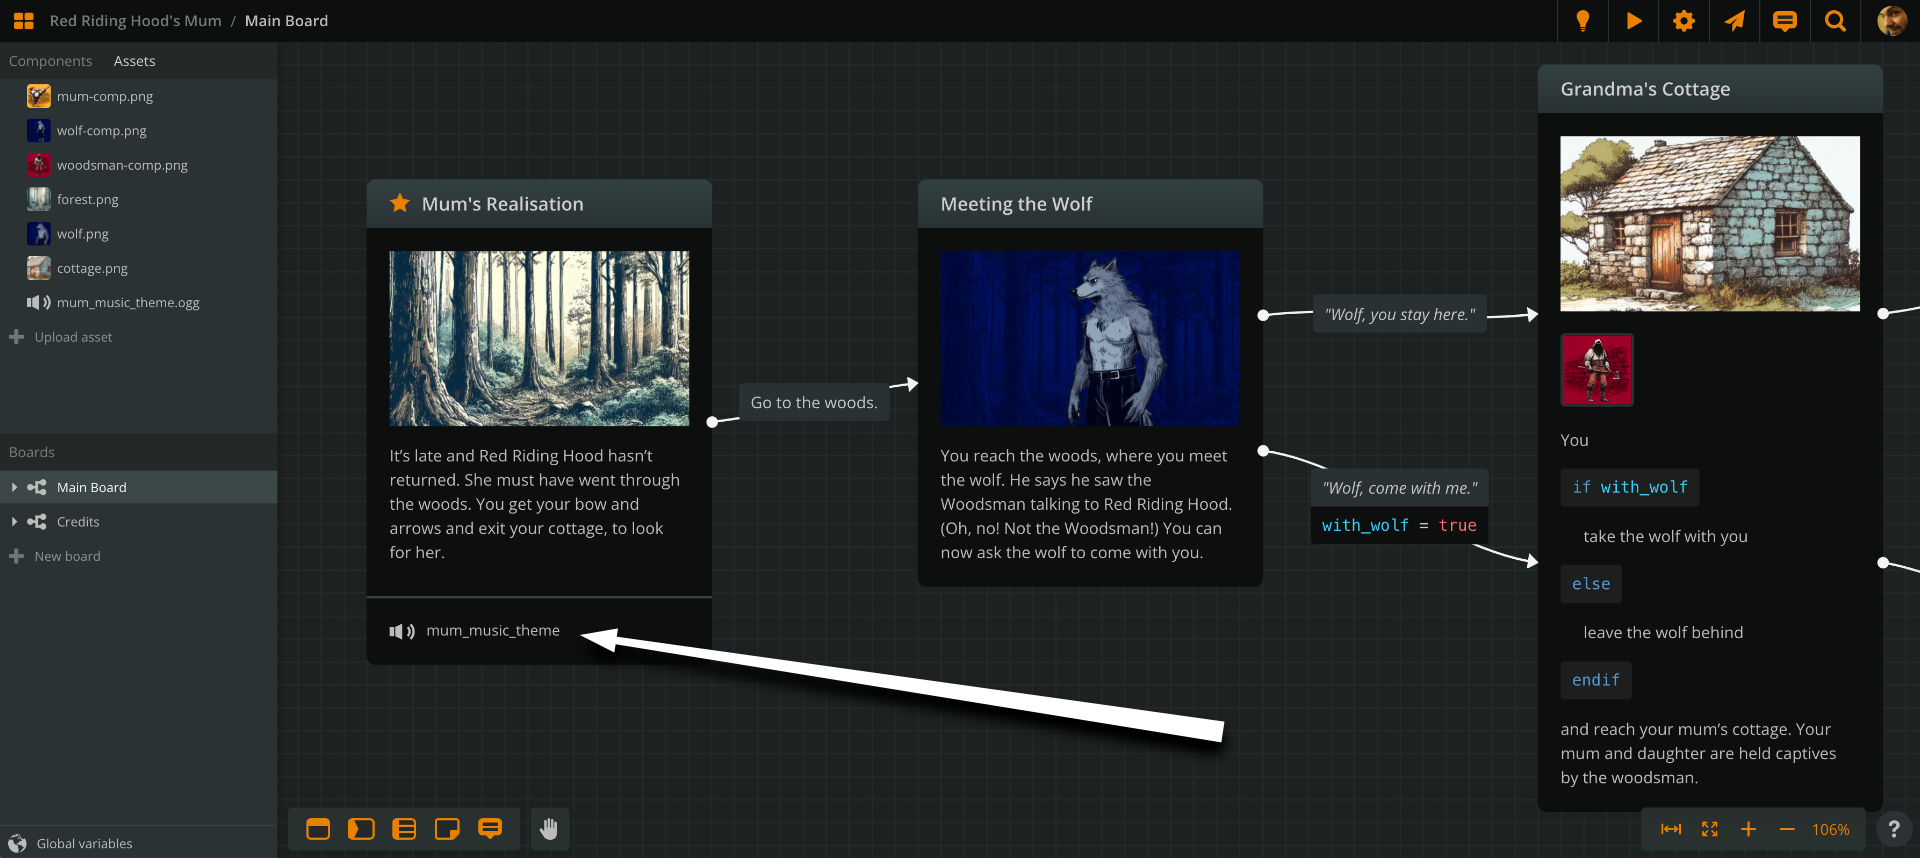
Click the attached audio, to open its settings.
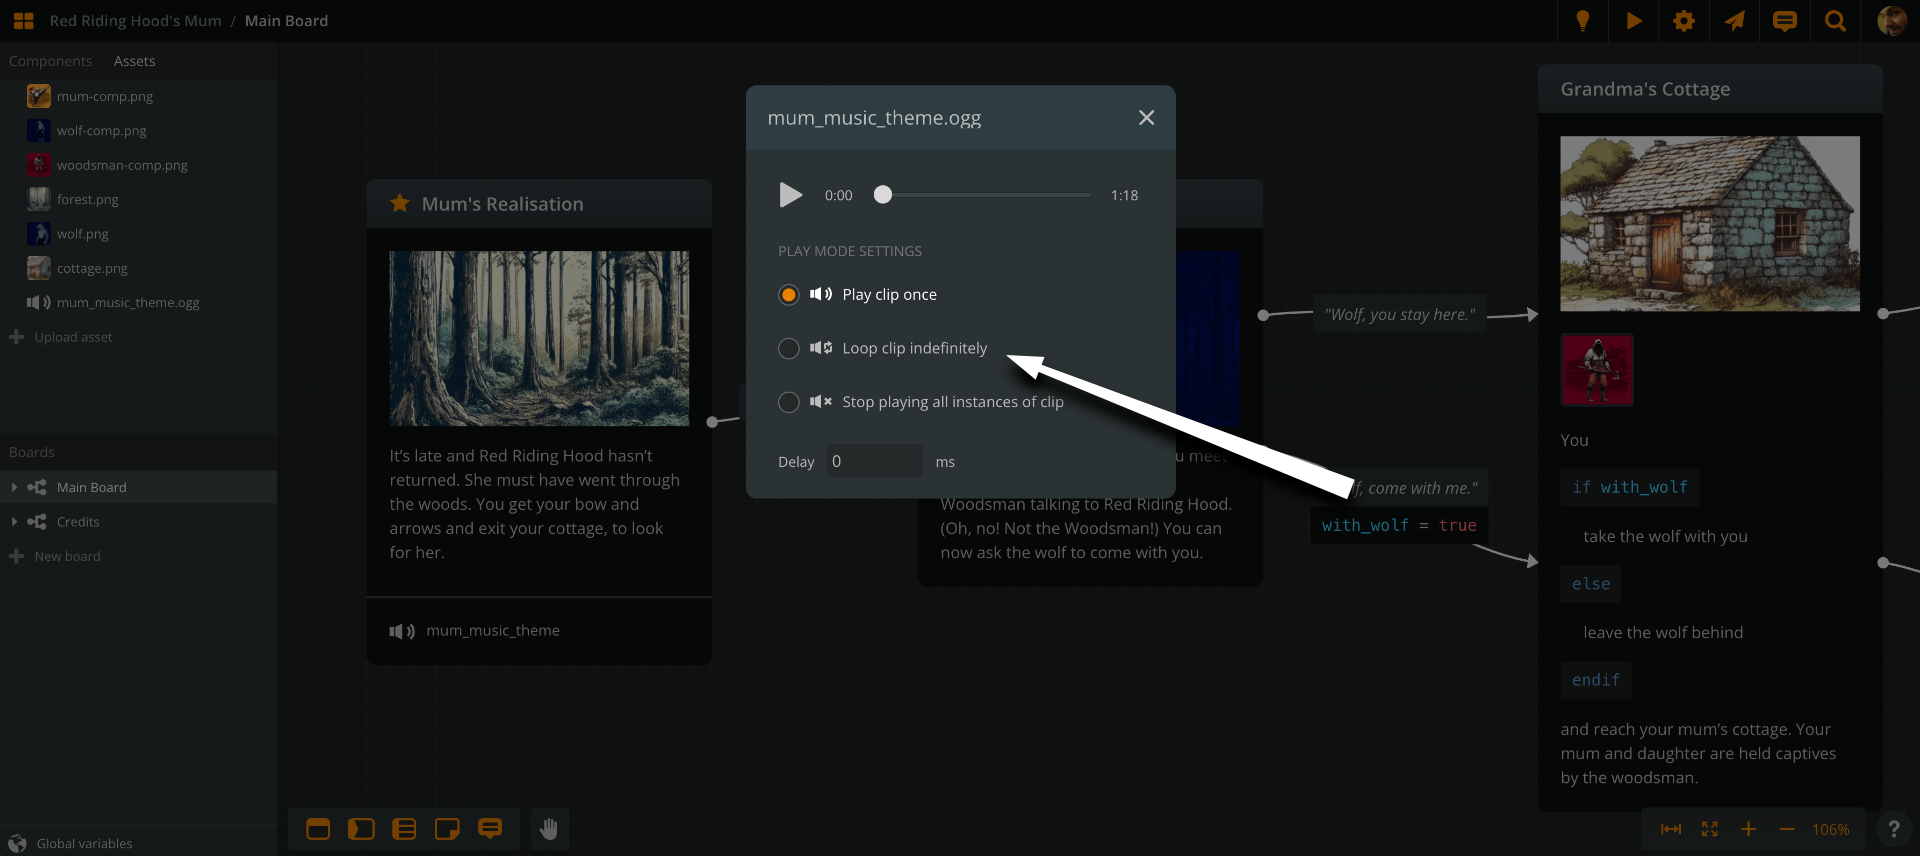
Choose Loop clip indefinitely. This makes sure the music never stops… mwahahaha.
Now, PLAY the story.
Create character components
And now for something completely different.
In Arcweave, you can use components to represent anything that populates your story: characters, locations, items, weapons, spells, clues—anything you need.
You can get deeper in components in your own time. For this example, we will create a few components for the story’s characters.
Create a component
Go to your Components tab, at the top left, next to Assets and click +New component.
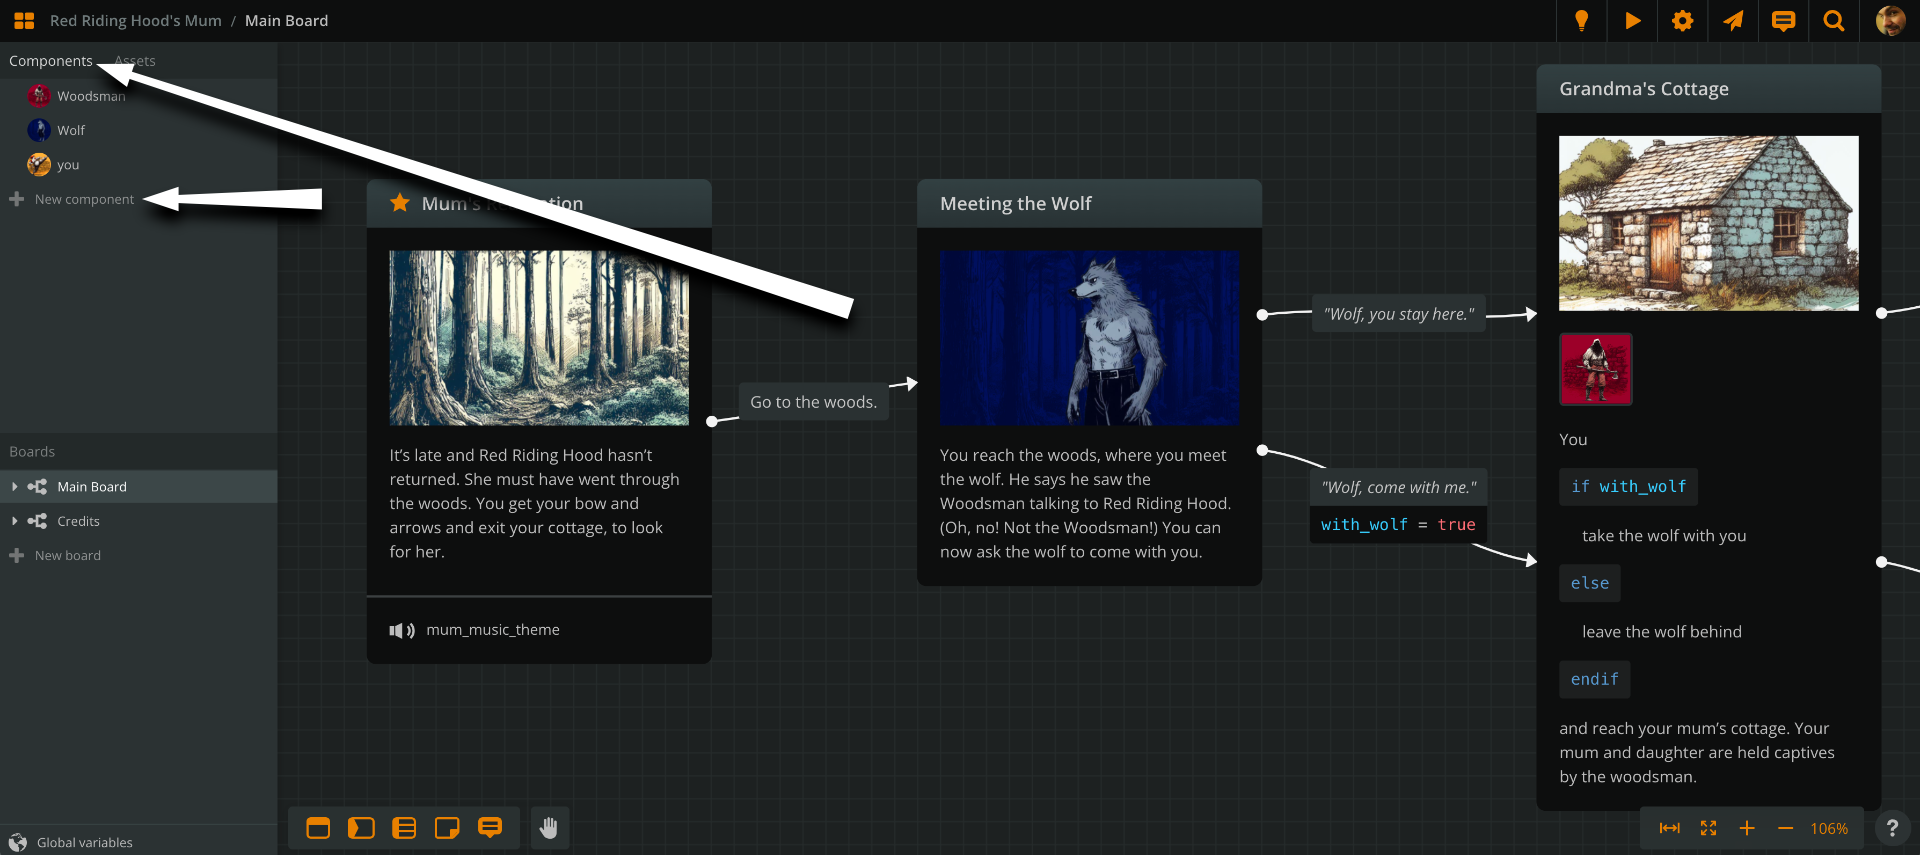 Creating a component immediately opens the Component Editor.
In the Component Editor, you can:
Rename the component
Click on its current name—Untitled component—and change it to Wolf.
Change the component’s cover image
Hover over the current image and click on the Change cover button that appears on its right.
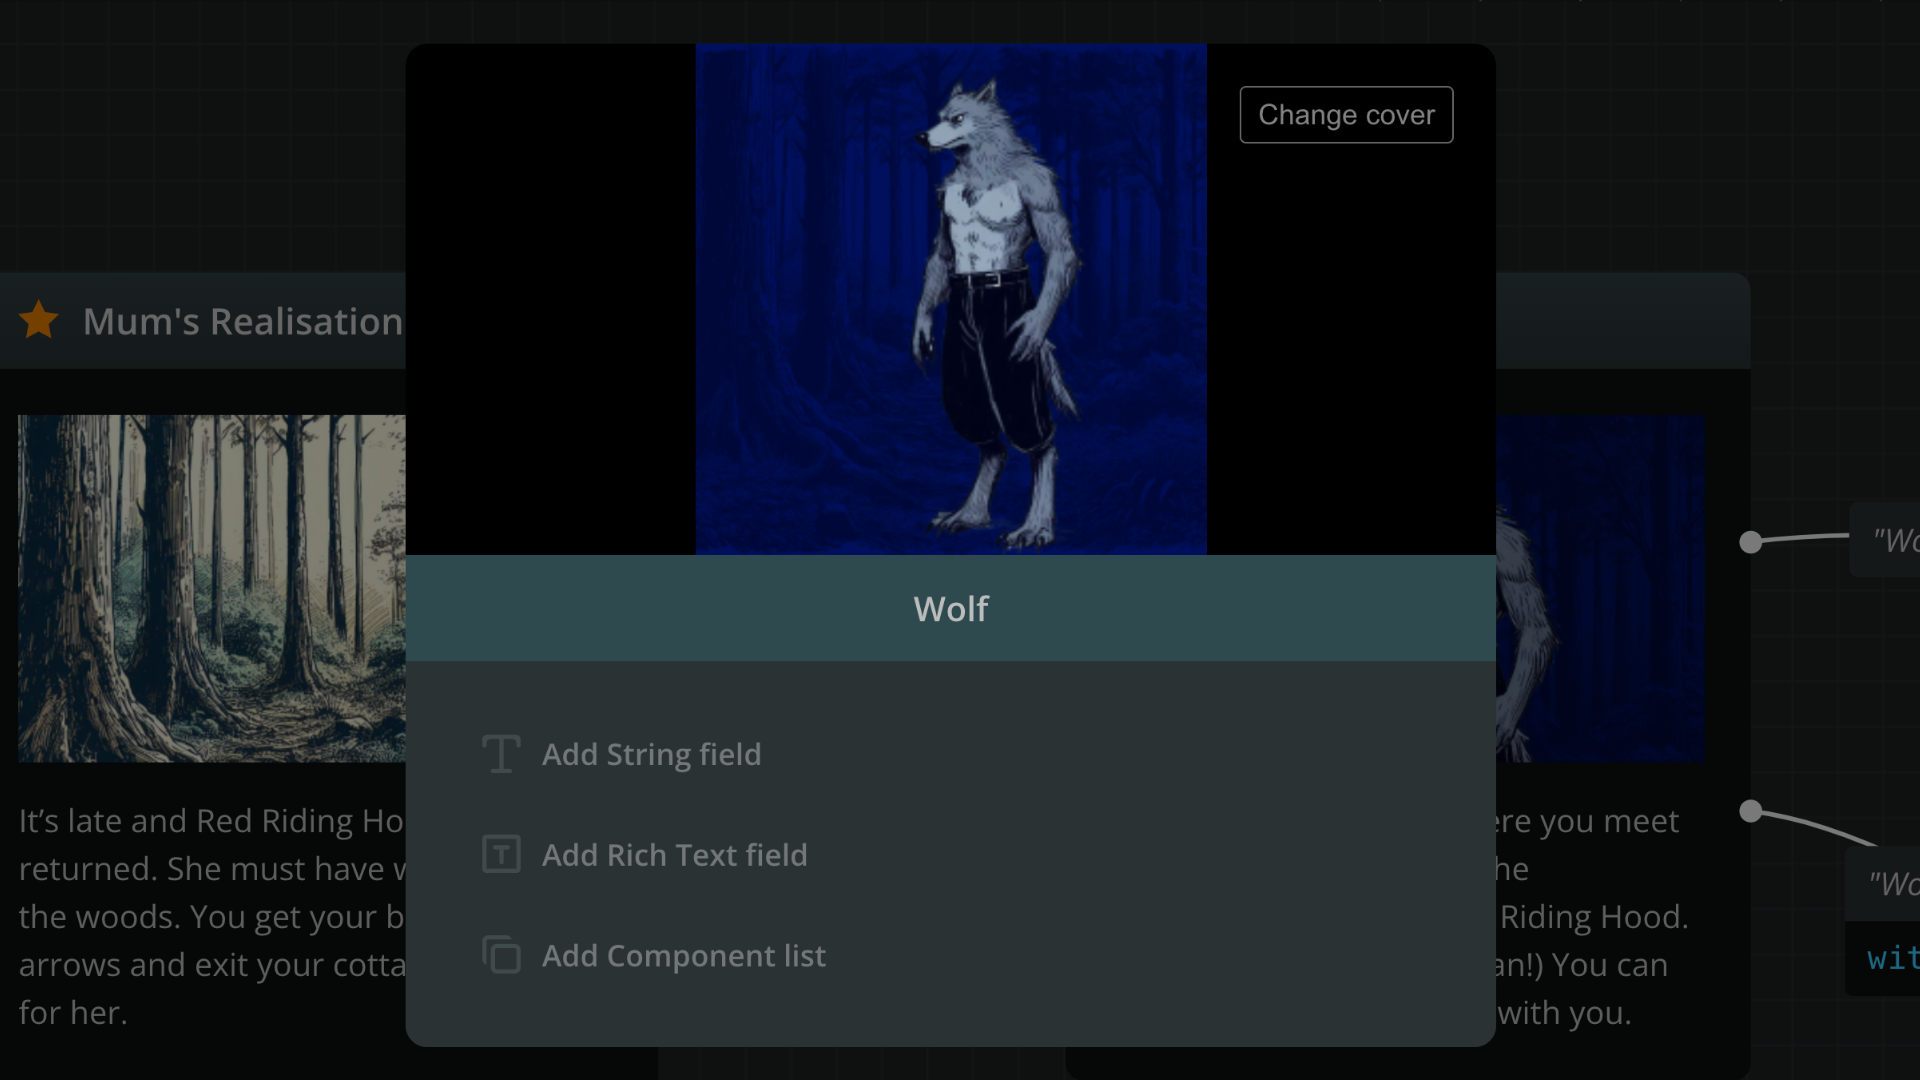
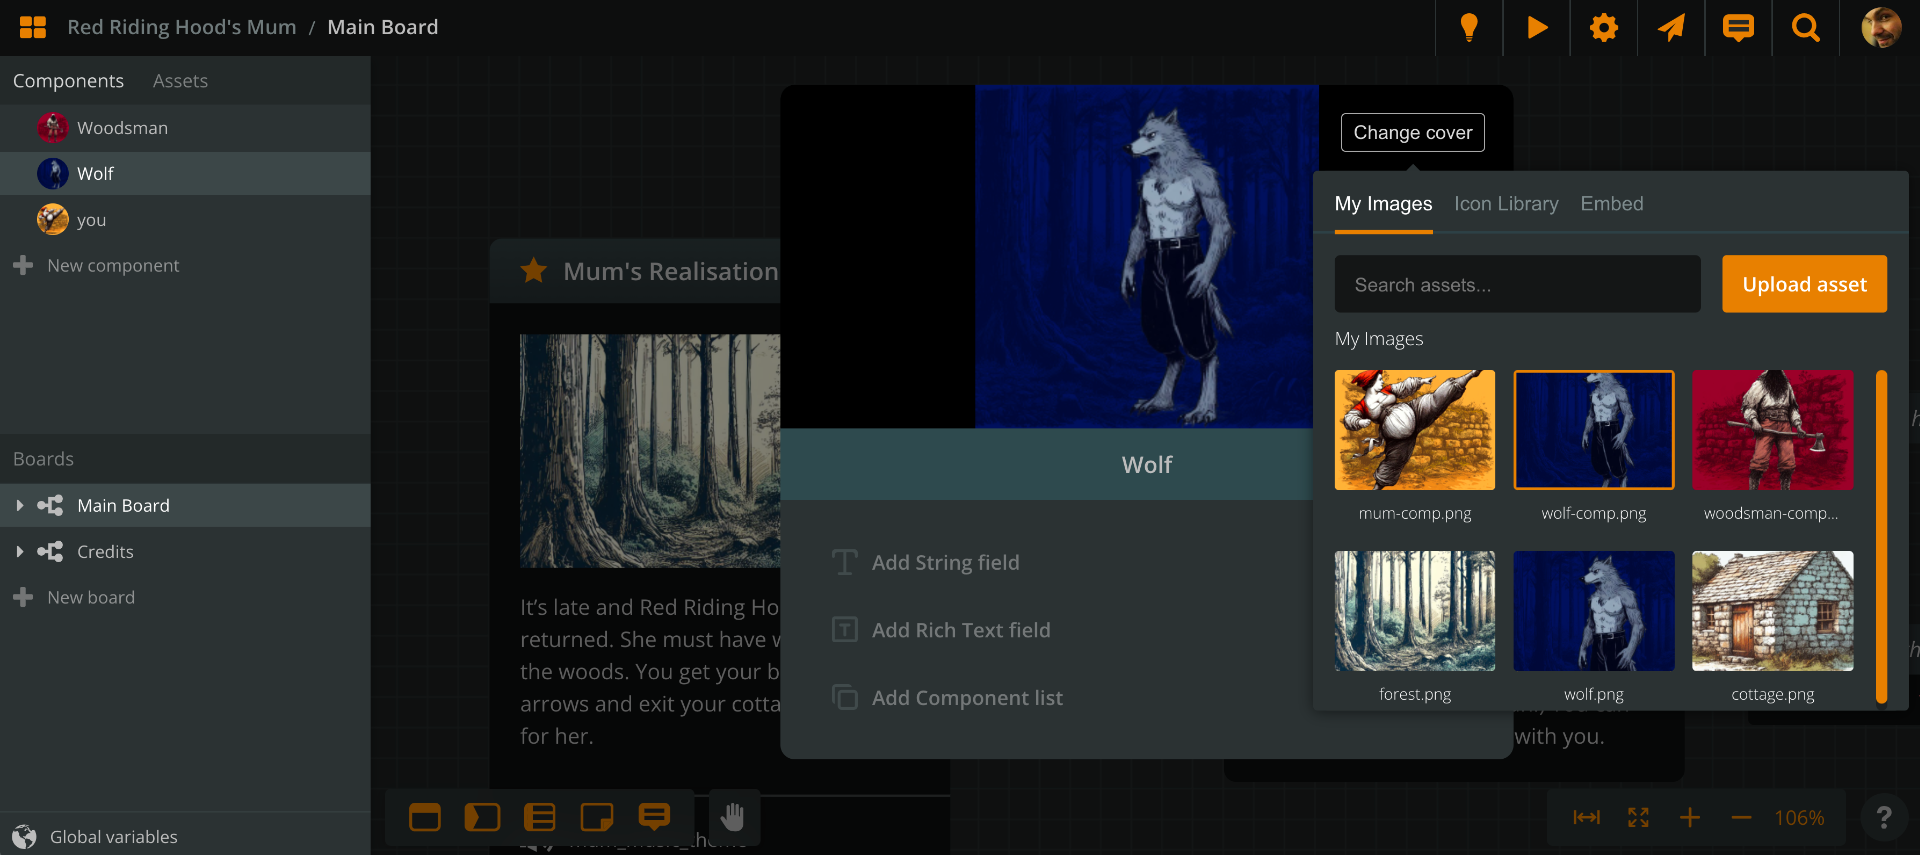
You can now choose from:
- Arcweave’s built-in Icon Library: click on the Icon Library tab and search for wolf. Pick one of the icons and you’re set.
![]()
or:
- My Images: your uploaded assets. Select
wolf-comp.jpg(the square image of the wolf) and you’re also set.
Add and edit the component’s attributes
To add an attribute, click on the + button. There are three options, but choose Add Rich Text field for now.
Click on the attribute’s name and change it to Description. In the attribute’s value field (the contents), type a short description of the Wolf: Lives alone in the woods. Ally and friend of Red Riding Hood’s family.
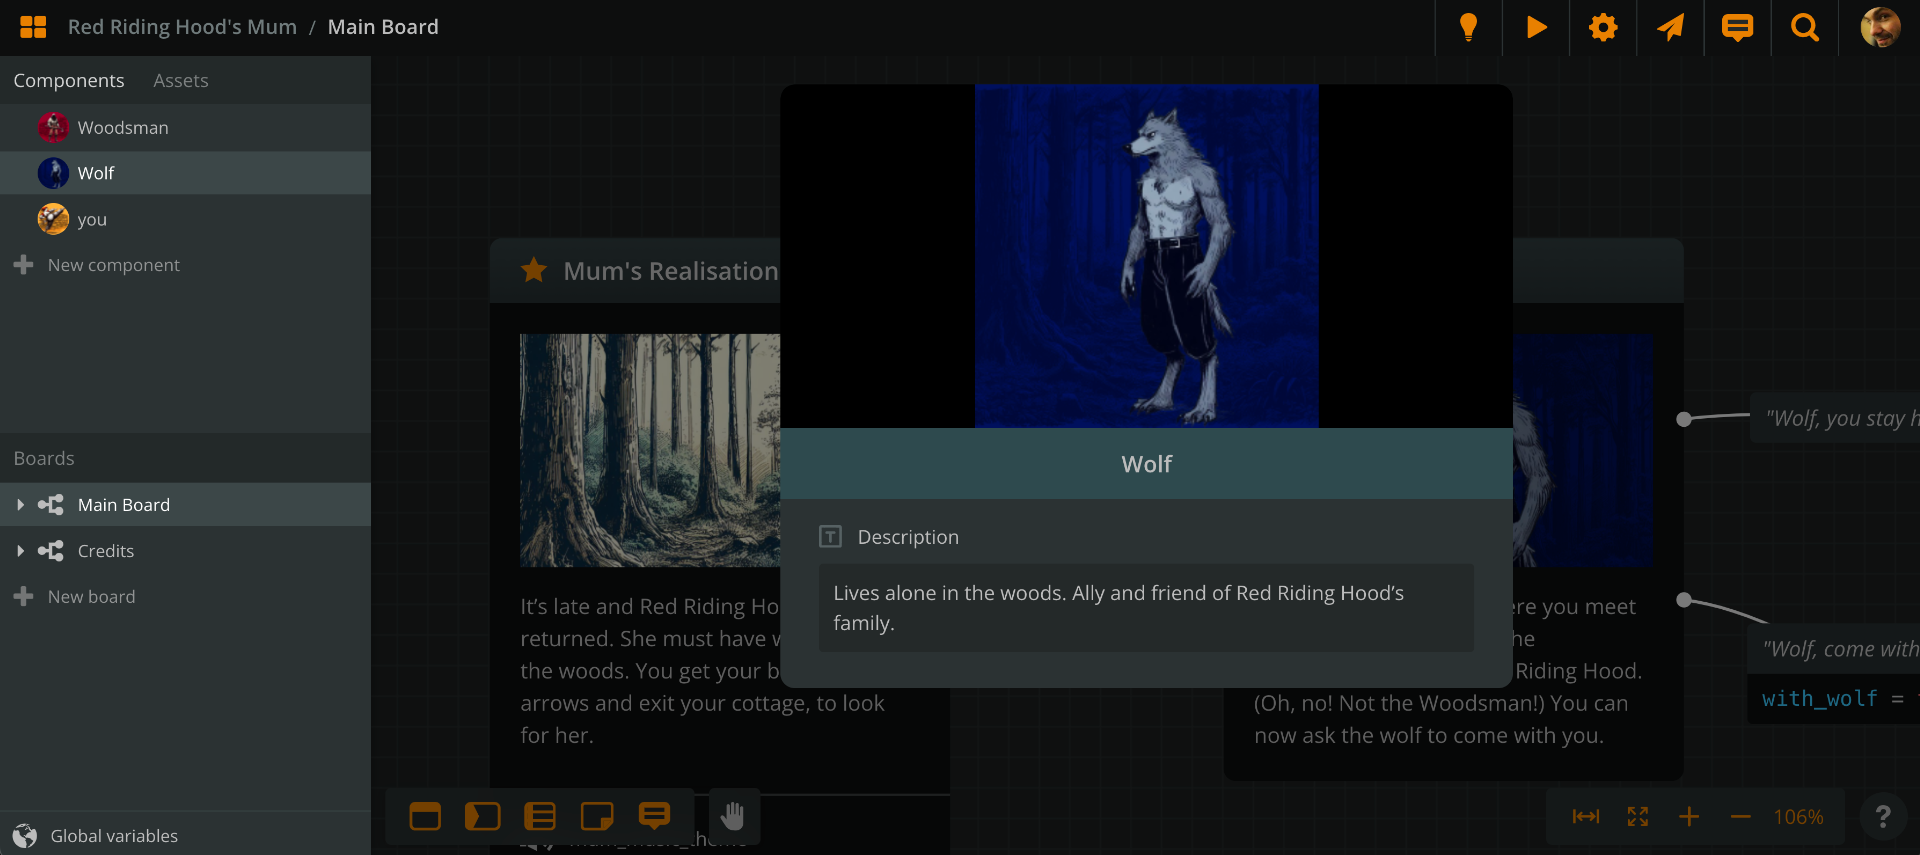
Press ESC—or click anywhere outside the editor—to close it.
Create all your characters
Repeating the above steps, create the following characters:
- Mum (or "you," since it's the player character)
- Wolf
- Woodsman
Reference your character components
One of the uses of creating components is to reference them in your text.
For example, go back to your Meeting the Wolf element and delete the word Wolf. At it’s place, type the @ character and begin typing Wo… A list of components will appear, narrowing down as you type, until you spot Wolf. Choose it.
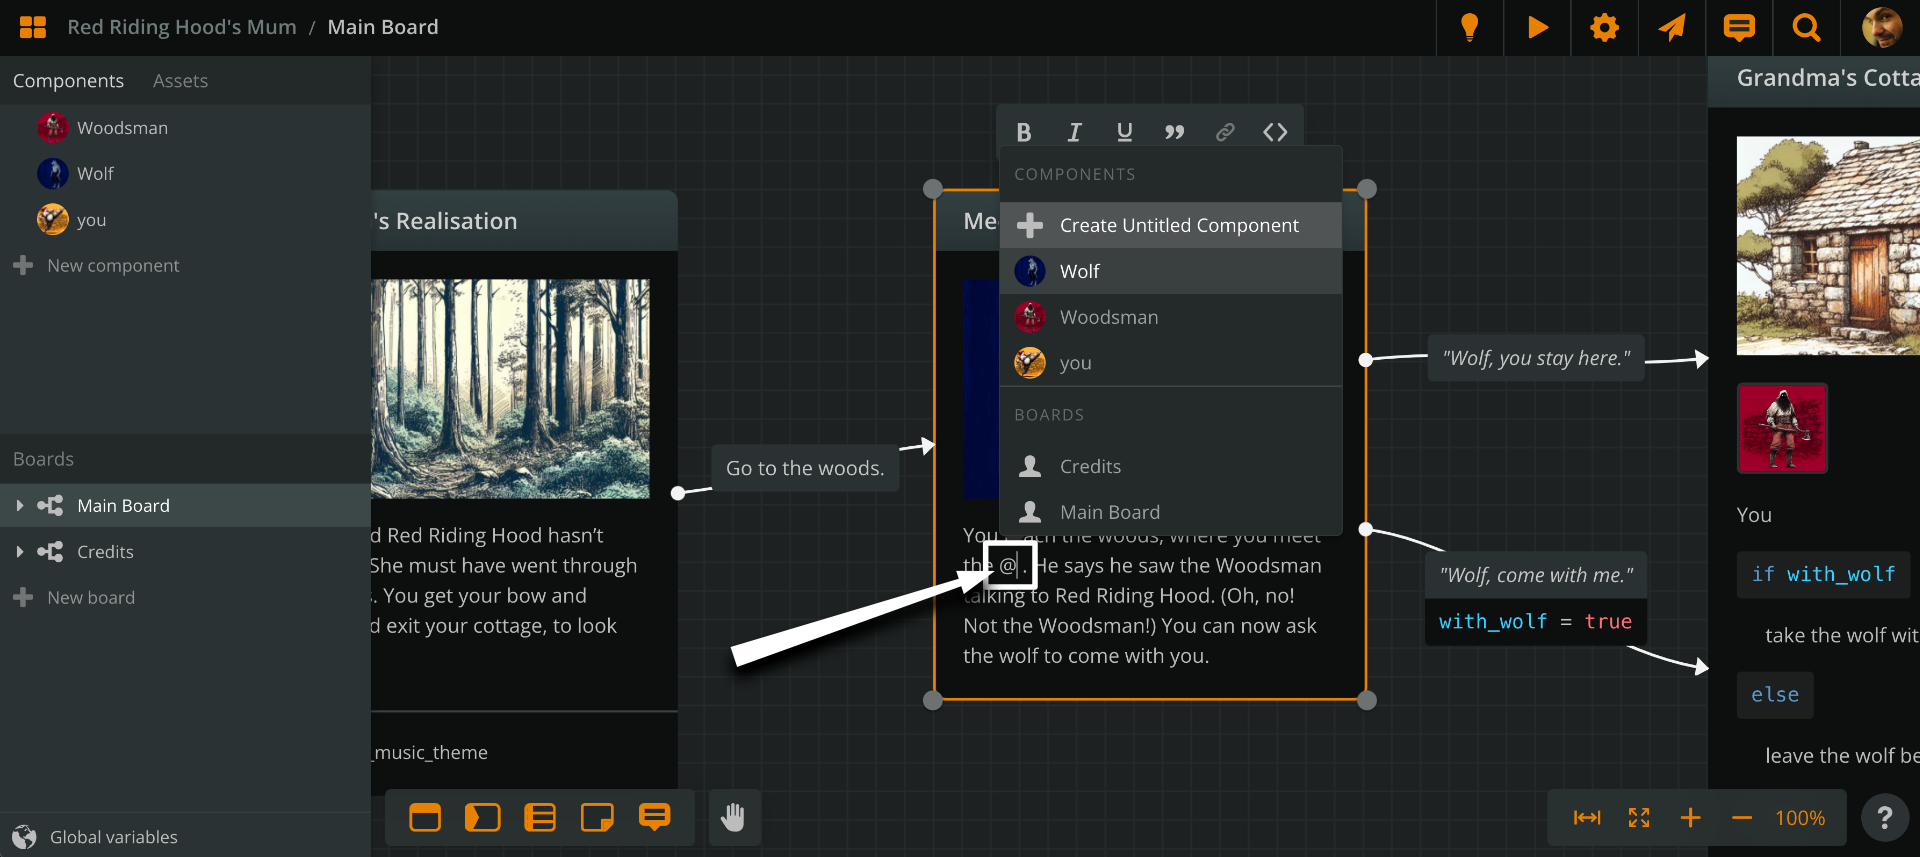
Note: if you type a non-existent component name and press ENTER, Arcweave will create a new component under that name.
The word Wolf is now in orange colour. This is because it is not static text, but a component reference.
A reference is:
- a link that opens the corresponding component in the editor—try clicking it.
- dynamic text showing the component’s name, which automatically updates if you rename the component—try renaming the Wolf to Wolfman, for example.
This second feature is particularly helpful. As you may often need to rename a character mentioned in tens of places in the project, it helps not having to go through manual search. If you often experiment with character names, using component references is definitely a good habit.
You can reference a component in an element's content, title, a connection's label, as well as a component's rich text attribute.
Note: in Play Mode, component references show as normal text—not orange.
Attach components to elements
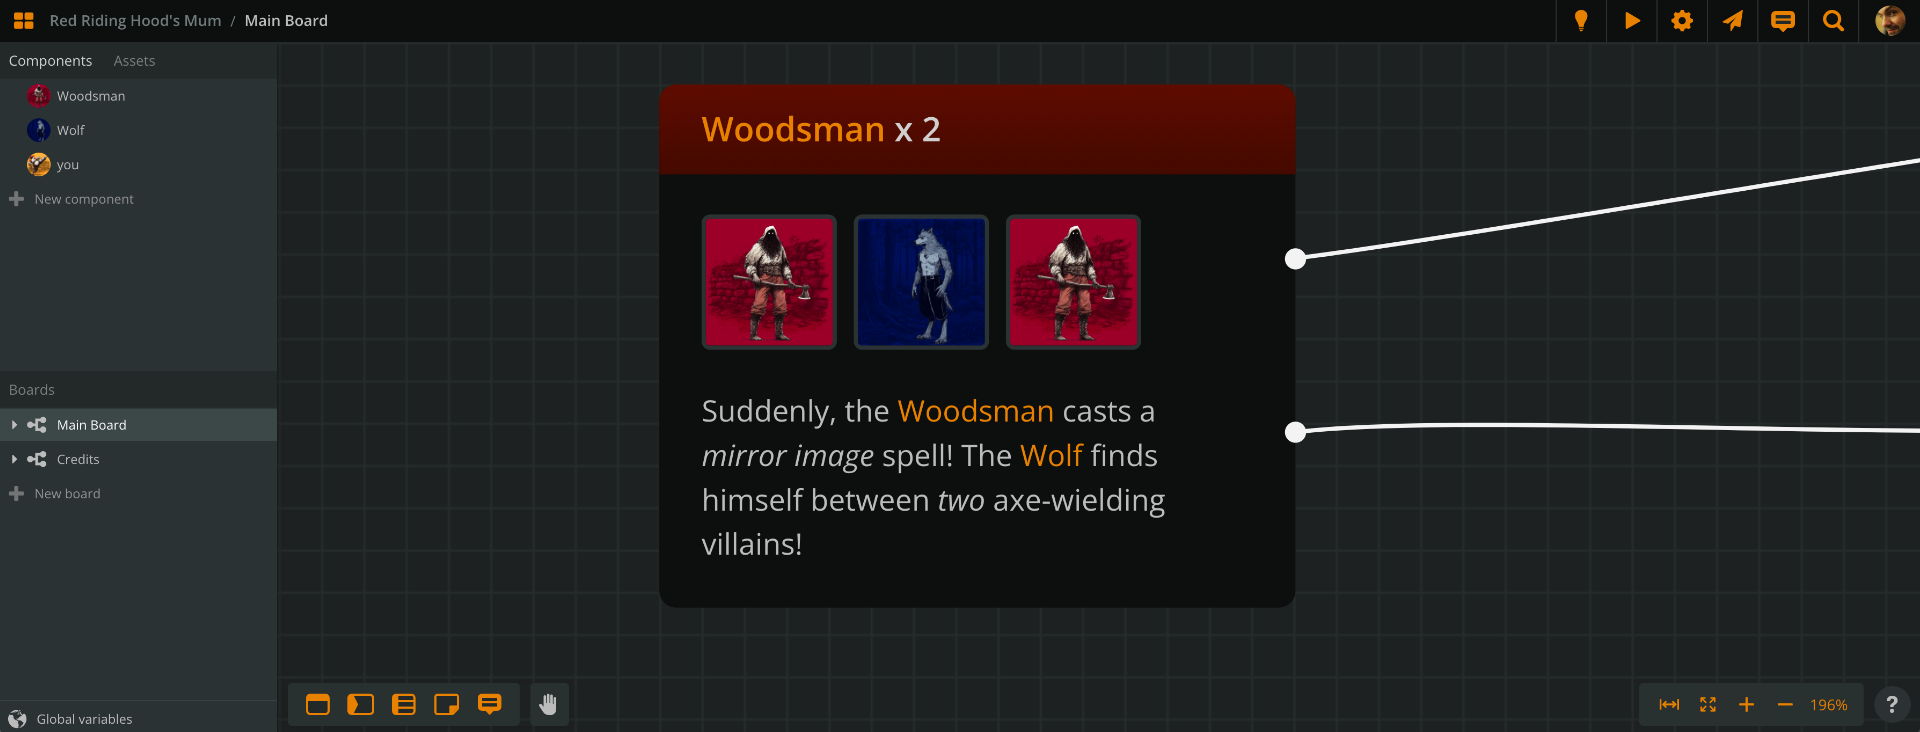
From your Components tab, drag the Woodsman component and drop it in the Grandma's Cottage element. This attaches the component to the element.
If you now right-click the element and Quickstart Play Mode from here, you can see that the attached component shows in Play Mode, as a thumbnail under the element’s cover image.
You can attach as many components as you like—as well as attach the same component multiple times.
If the element has no cover image, the attached components’ cover images will share the header image space in Play Mode.

Note: Components will become more powerful in the near future. Their attributes will turn into actual component variables, which you will be able to call and modify via arcscript code.
Now, it’s your time to shine
That was a long read—indeed, I wanted to include a taste of all the basic features, along with an easy to follow example.
I had to leave out some juicy stuff, like real-time collaboration & comments, debugging, and manipulating audio clips, but you can read further when you’re ready. Dig deeper by following each section’s links to more detailed articles.
And of course, for even more tips and tactics, watch our video tutorials series.
Finally, don’t be shy! Reach out to the Arcweave community itself! You’ll find all the AW-Team along with our creative users on Arcweave’s Discord—answering questions, admiring bugs, and brainstorming new Arcweave features.
More importantly: start your own project in Arcweave today and see how easy writing interactive stories can get.