Collaborate in Arcweave
Boost your team’s workflow with the narrative engine’s powerful real-time collaboration.

Ah, the writers’ room! That enviable place where ideas fly, creativity flows, and stories flourish!
And wouldn’t it be great if you could replicate this buzzing environment online while writing your interactive story?
Arcweave can’t find you a team, but it sure can create the perfect nurturing environment for your team’s productivity.
This article describes how to collaborate in Arcweave, both synch- and asynchronously. If you need to learn the basics first, begin with the Arcweave QuickStart Guide or read how to write your interactive story in Arcweave.
So, let’s see how collaboration works.
Project roles
Every Arcweave project has an owner, who can then invite other Arcweave users as editors or viewers.
Project owner
The project’s owner is unique and the project complies to the limitations of its owner’s account—e.g. a free user cannot increase the project’s items (elements, branches, jumpers, comments, and components) above 200.
As a project’s owner, you can modify the project, by creating, editing, and modifying items. You can also leave and reply to comments.
The owner is the only role that can invite other collaborators:
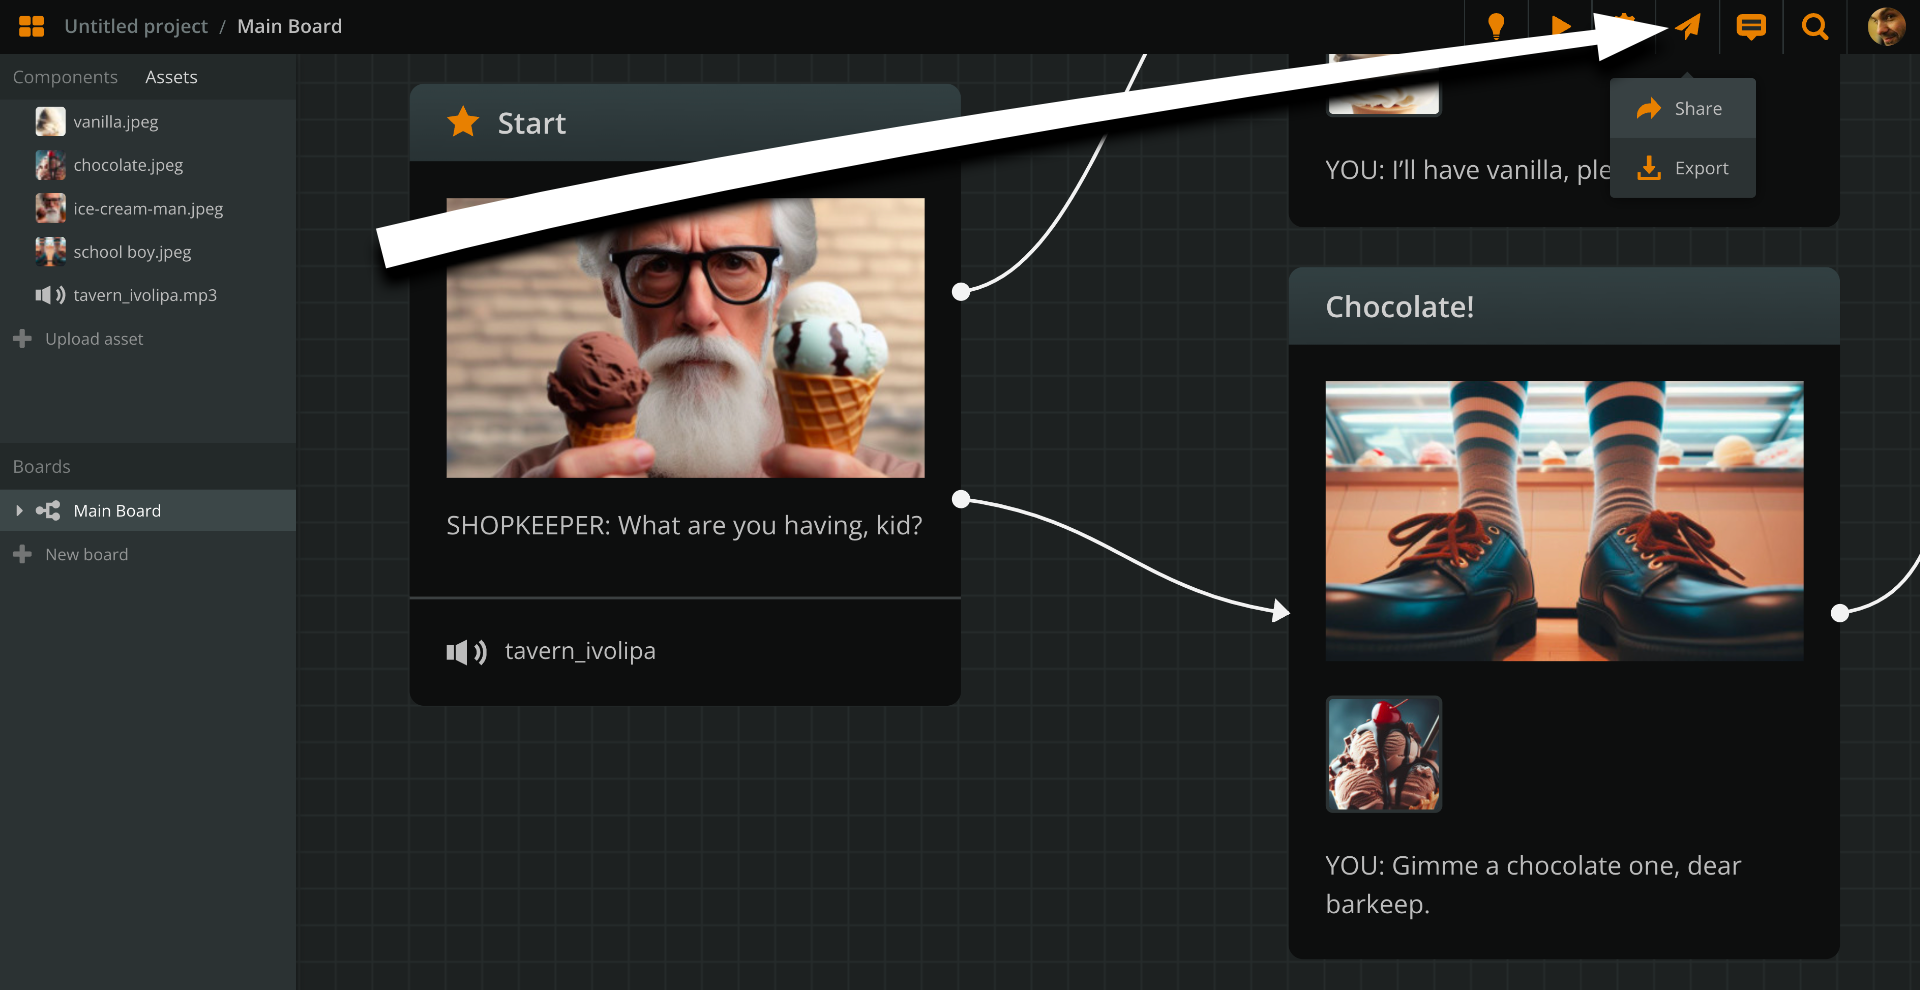
- click Share & Export (the paper plane icon on the top right)
- click Share.
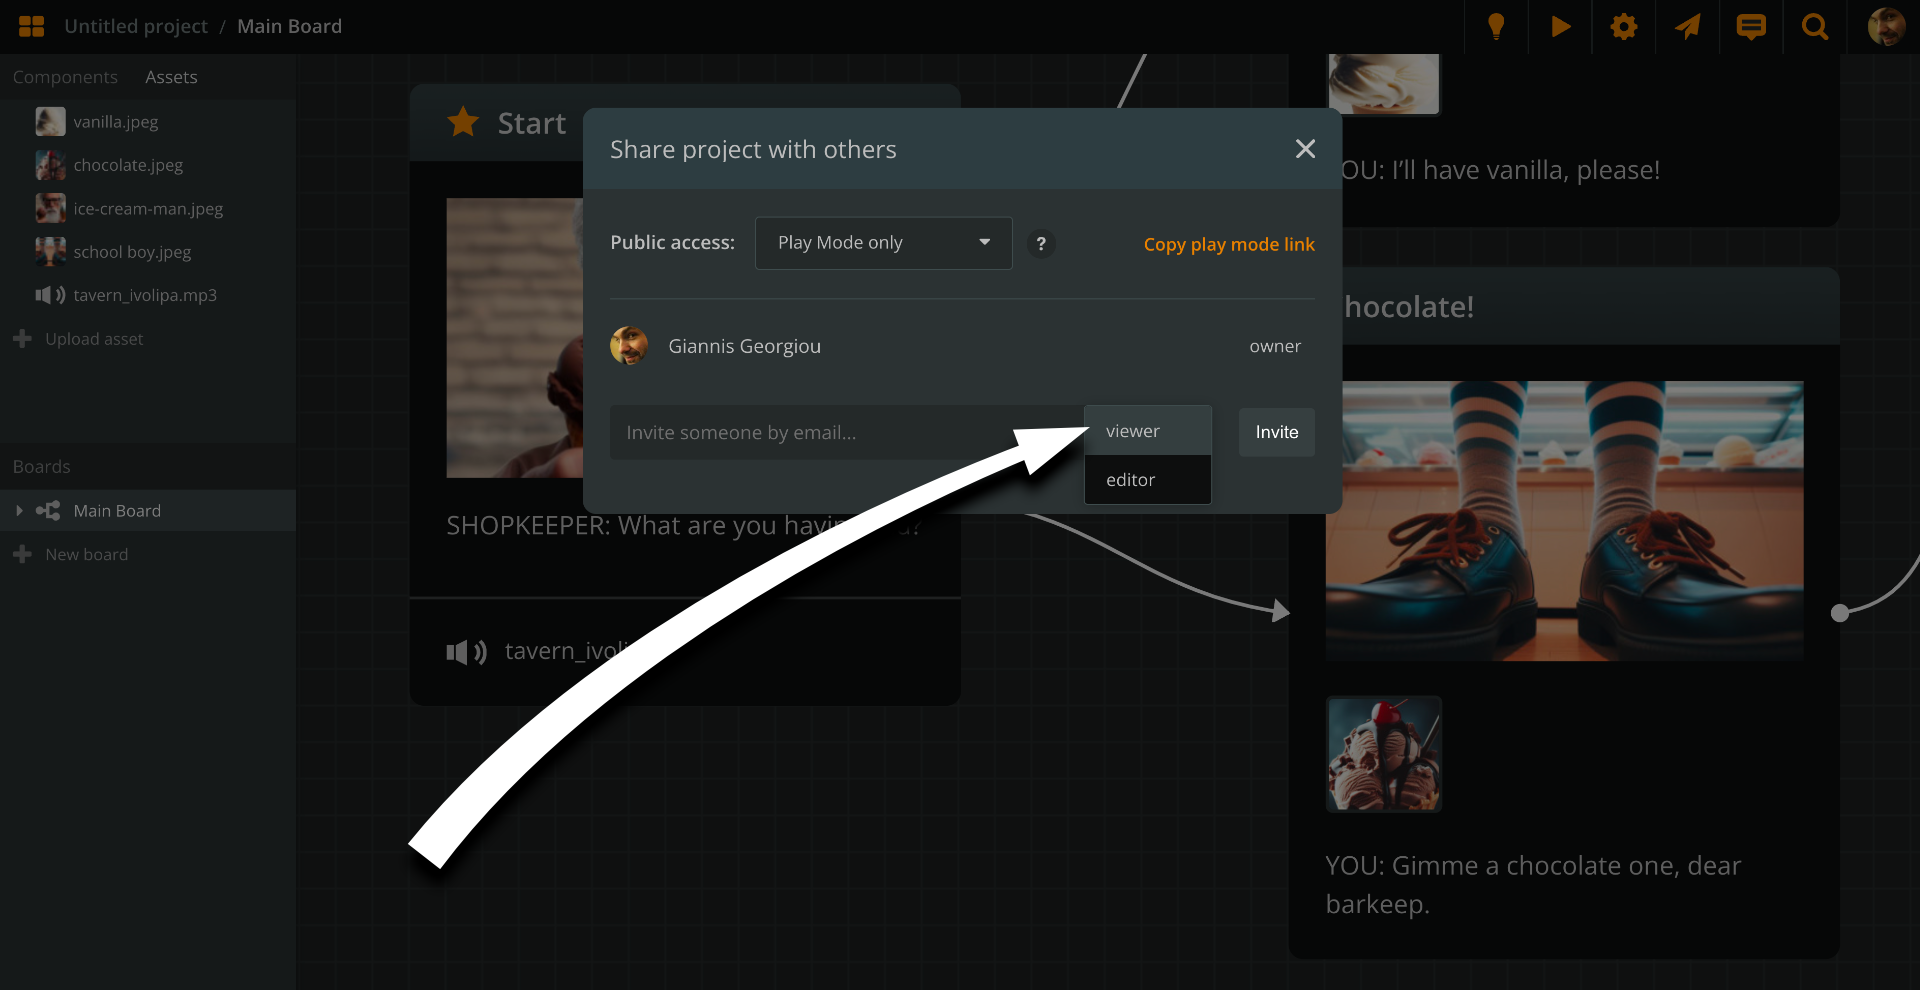
- type your collaborator’s email address in the appropriate field.
- choose a role from the drop down menu, i.e. viewer or editor.
- click Invite.
Once the other user accepts the invitation, they can start collaborating according to their role.
Editor
Like the owner, the editor can also edit the project and leave or reply to comments.
Contrary to the owner, the editor cannot invite users for collaboration.
Viewer
A project can also have viewers. Viewers have a read-only access to the project: they can view the boards and the Play Mode, but they make edits.
Viewers can also leave and reply to comments.
Transferring ownership of a project
Once a project has one more collaborator, you the owner may choose to transfer the project’s ownership to them.
From the Share & Export > Share popup, change the collaborator’s role from editor/viewer to owner.
Attention: Transferring a project's ownership cannot be undone!
You can check the fineprint of all roles in the Sharing page of Arcweave’s documentation.
Real-time collaboration
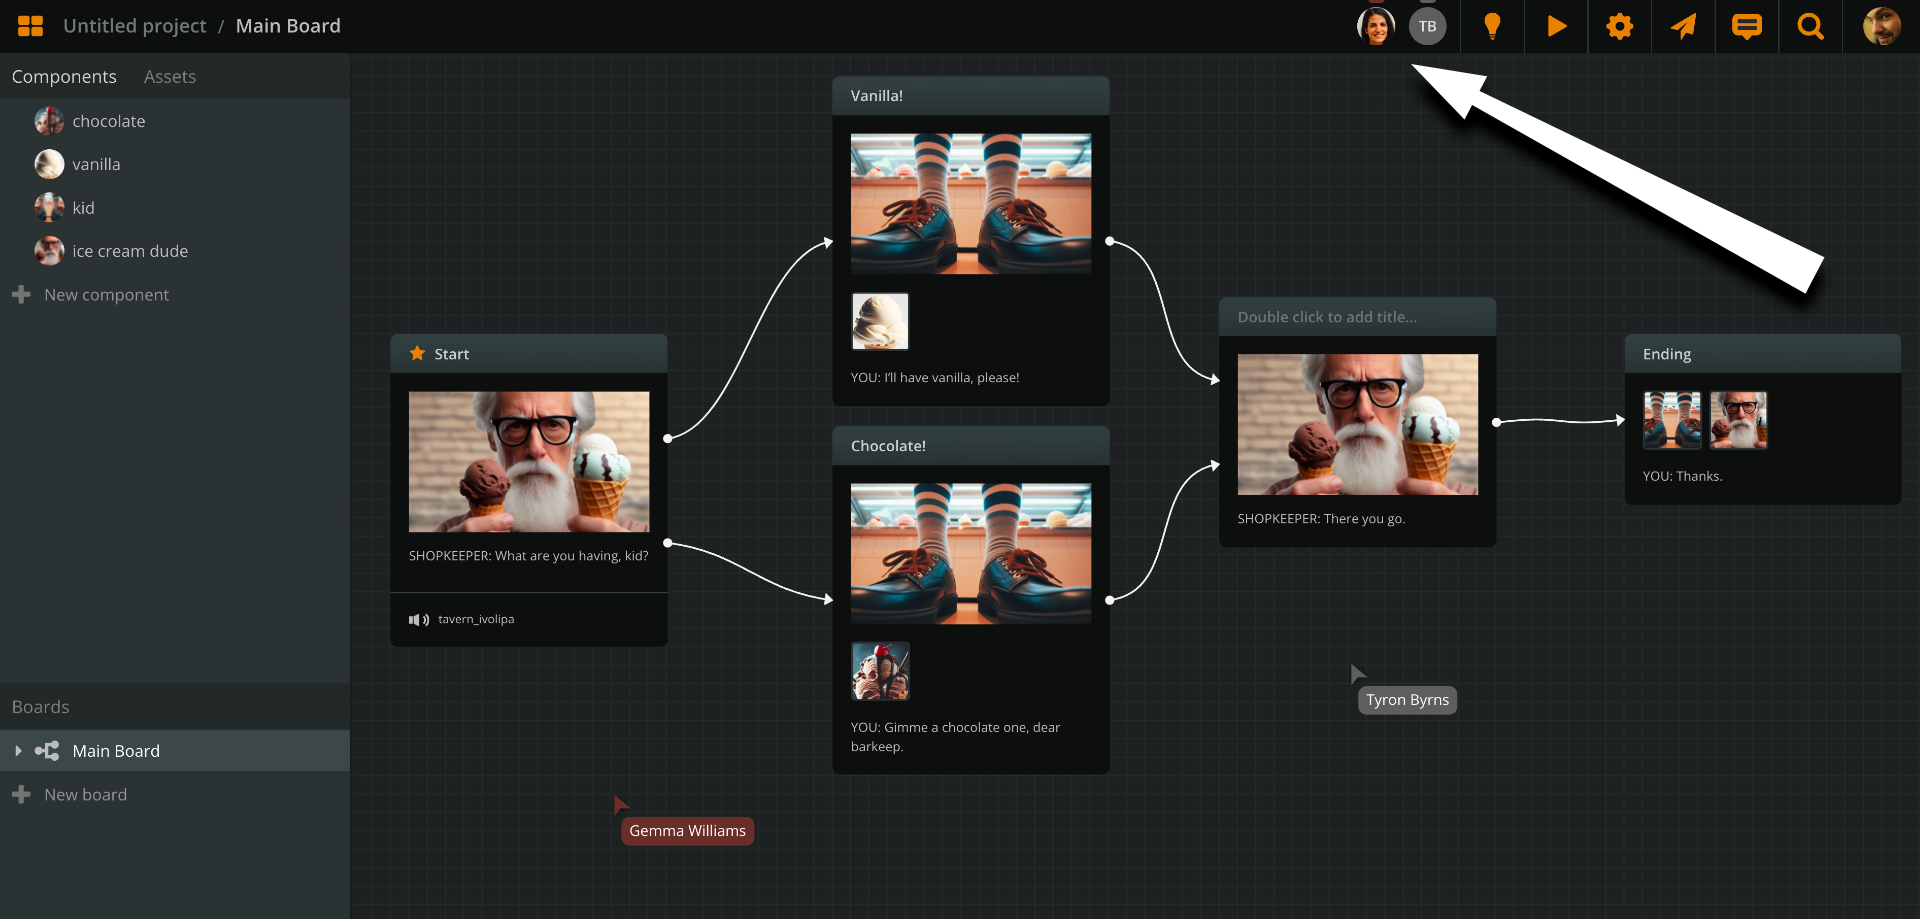
When owner or editors simultaneously work on the same project, they can see each other’s mouse cursor, their avatar on the top menu, as well as their edits happening in real time.
Comments
For asynchronous collaboration, team members can create and reply to comments. Once a comment gets a reply, users get an email notification, if this option is turned on in the comments settings.
Creating, replying to, and deleting comments
To create a comment:
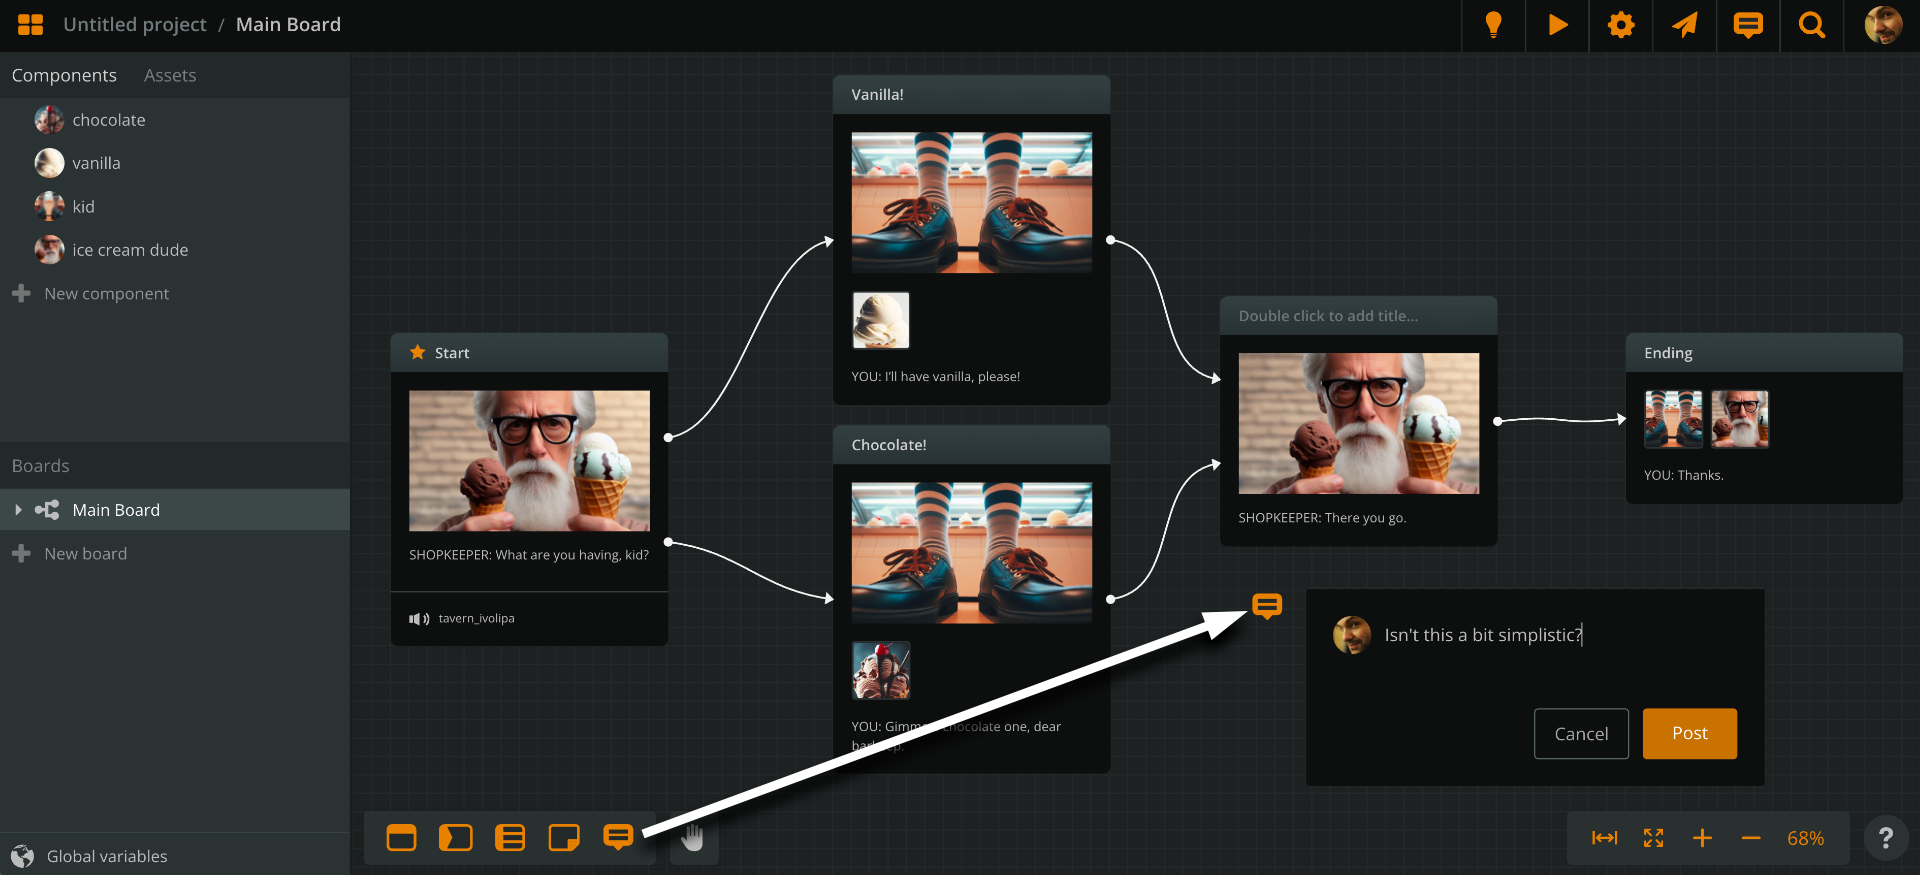
- drag the comment icon from the items menu (bottom left-ish) into an area of the board.
Alternatively:
- right-click on an empty area of the board
- choose Create Comment.
Then, you can immediately start typing your comment. To submit your comment, click on Post or press Ctrl+Enter or Cmd+Enter. Same for replying.
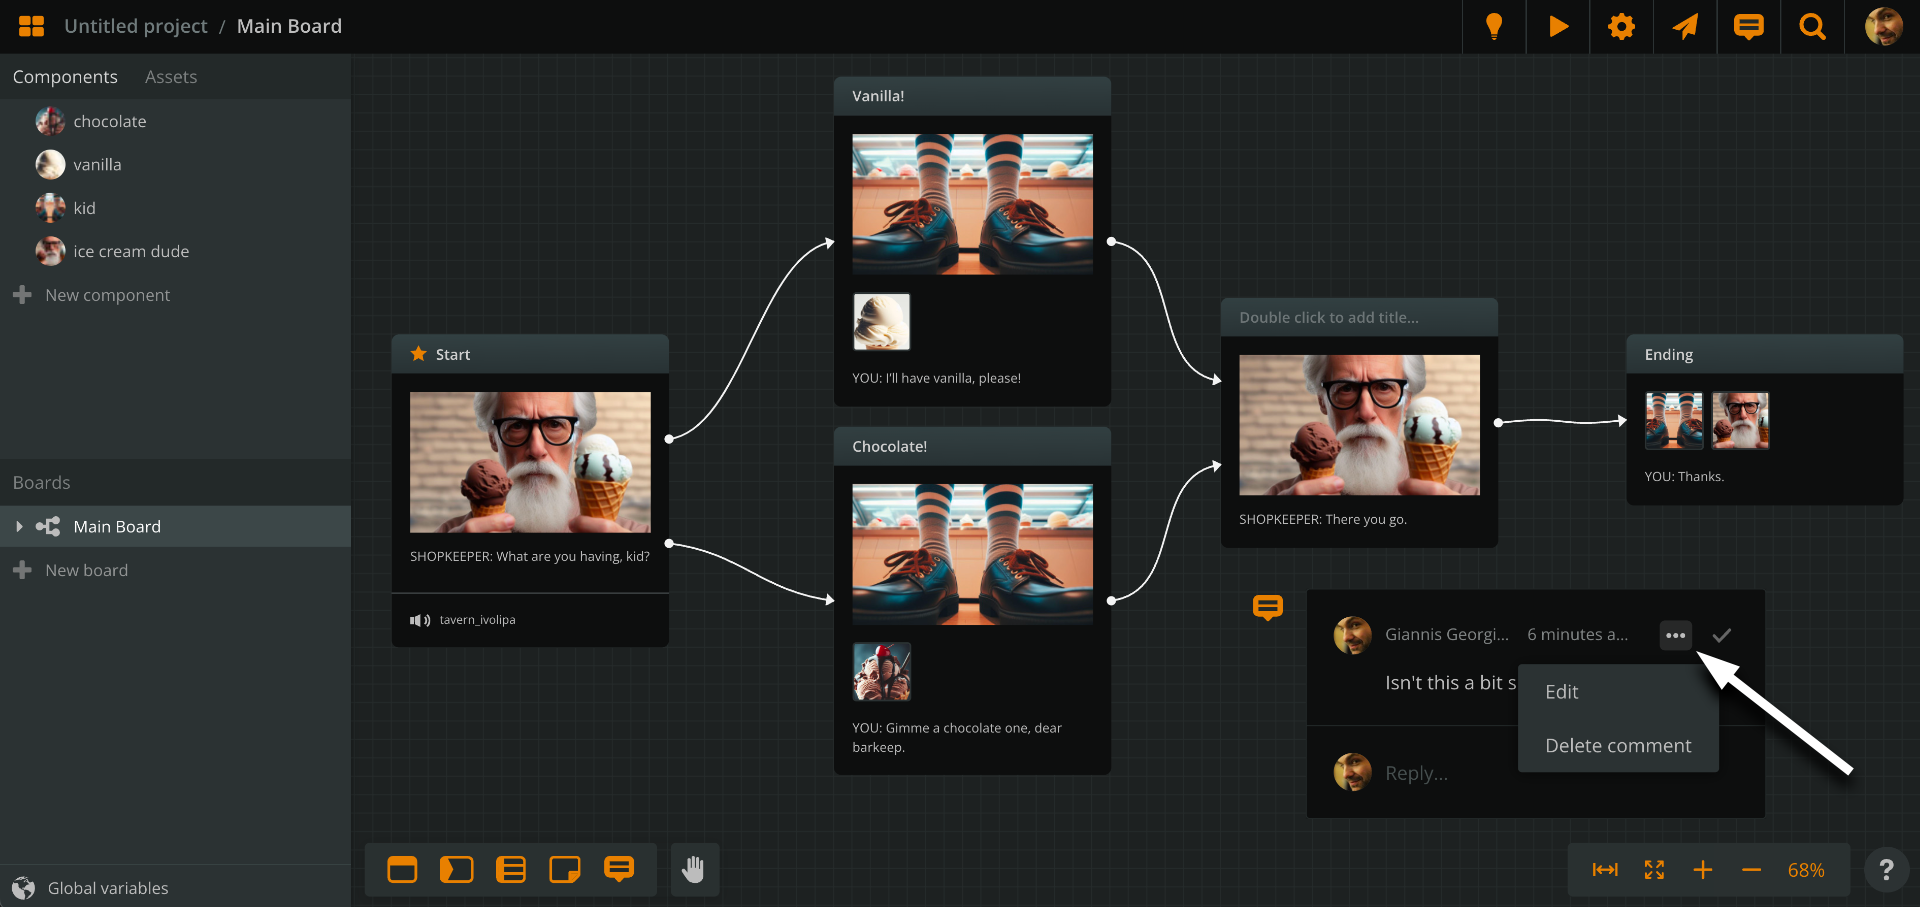
From the ••• icon, you can edit or delete a comment.
Comments list & settings
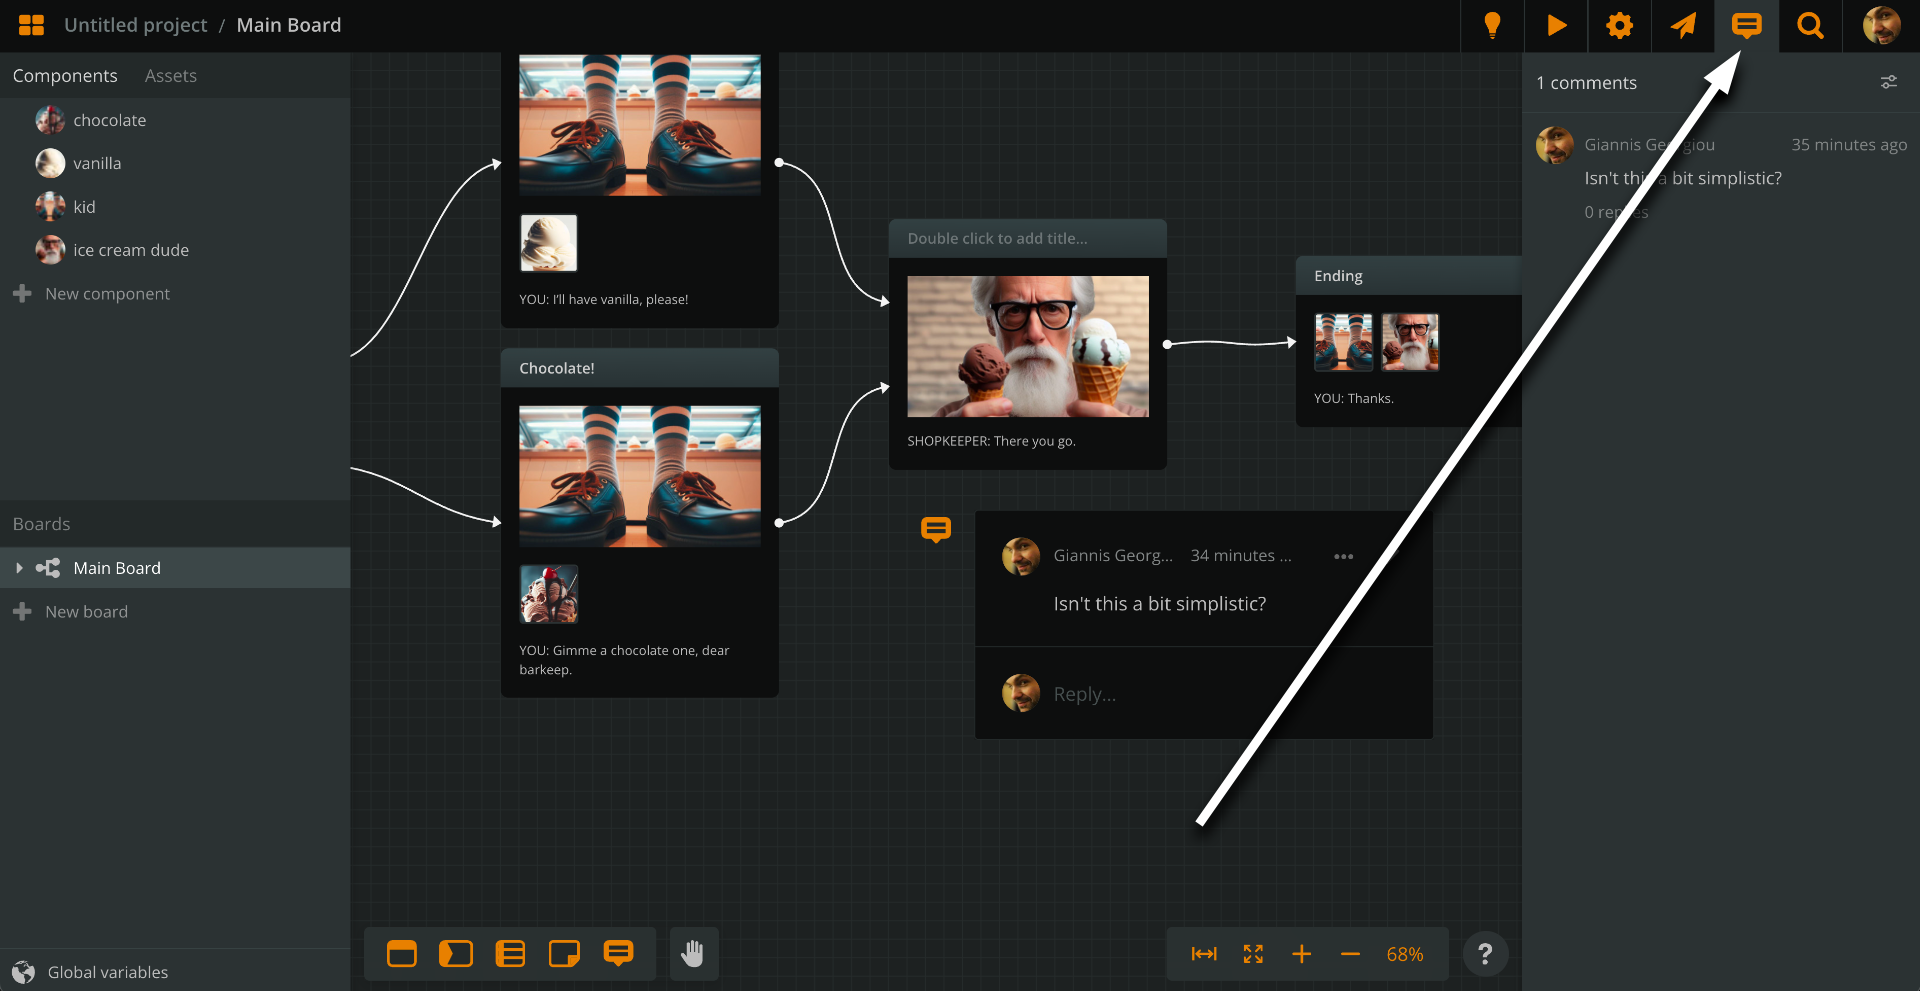
At the top right, click Comments (the dialogue balloon icon). This will open the comments list, which contains all comments of the project.
Click any comment in the list and you’ll teleport to that comment.
At the top right corner of the list, you’ll also find the comment settings icon. Use it to toggle:
- showing resolved comments.
- email notifications.
Comment video tutorial
To see Arcweave’s comments in detail, watch Episode 20 of our video tutorials:
Get the best out of Arcweave’s collaboration features
Every team is different; some need lots of editors, while others need mostly viewers to give notes and comments. Even solo writers need a fresh point of view every now and then.
This is why Arcweave offers its collaboration features to all its subscription plans.
Of course, every plan covers different needs and engages a different number of collaborators. Compare the available solutions and pick the one that best applies to your workflow.
Don't hesitate to reach out to us for advice and further details on which plan will benefit you the most.
Happy co-writing!
