Webinar: stop your game from living in 5 different places
We just wrapped the first of a series of webinars, each of which tackles a different feature, pipeline, or problem. The goals of the series are simple: help people understand the platform, show how Arcweave is meant to be used, and collect questions, issues, and feature requests along the way.
To illustrate this session, we build a small demo scene, where the player talks to an innkeeper NPC. Using this as an example, we show how Arcweave works as a specialized narrative platform that exports to different engines.
You can watch the webinar's full recording below.
Create and edit
Set up a project and invite your team
Start with a new blank project, then use the Share button to invite collaborators. You can add them as editors (who can modify content) or as commenters (who can only view and leave comments). Everyone shows up live on the board; their changes sync in real time.
Build the story
Elements
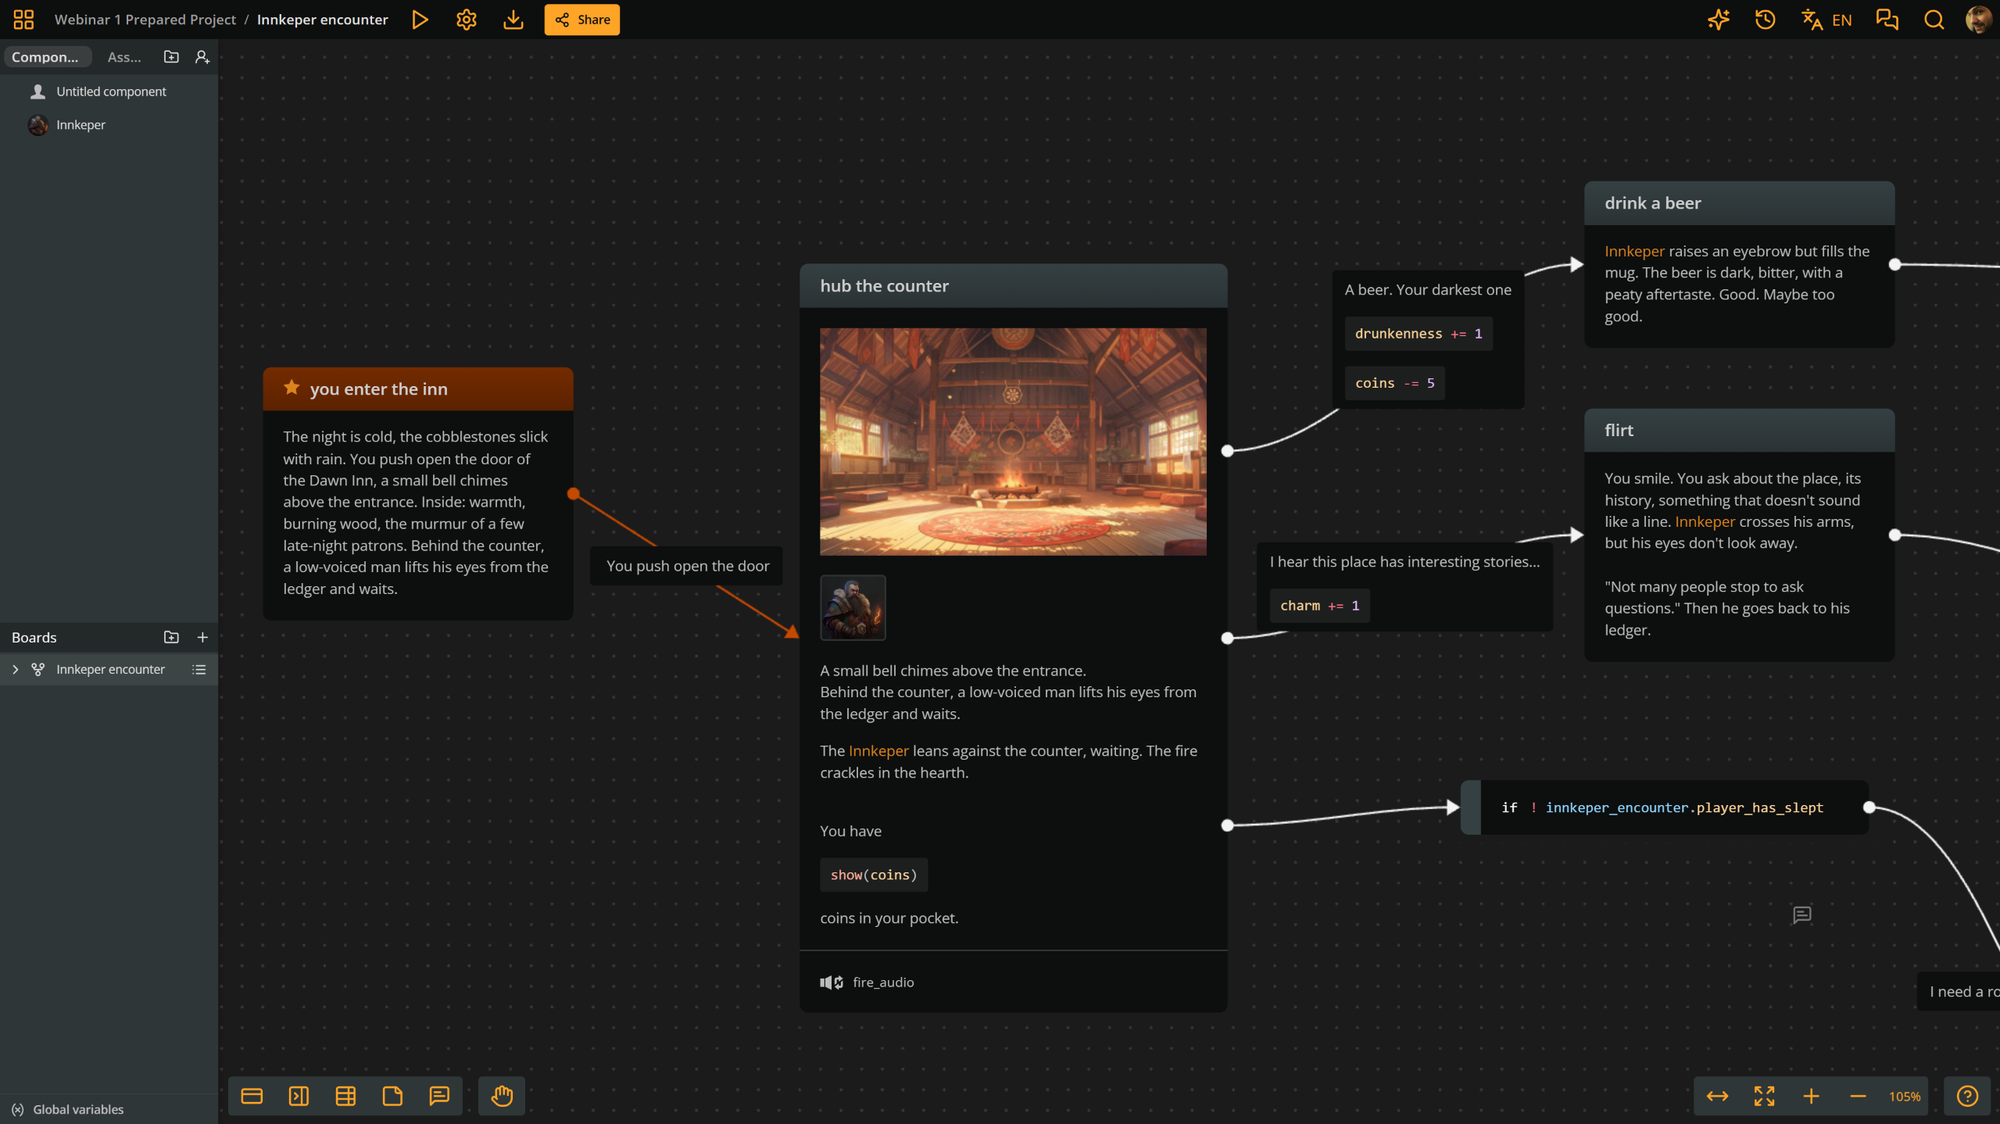
We begin with a first element, "You enter the inn," with a title and some content. Right-clicking it lets you set it as the start of play mode.
Branches
Branches divert the story flow according to conditions. Conditions are expressed using arcscript expressions (see Arcscript in branches, further below).
Jumpers
As a story grows, your boards will tend to get messy. Jumpers connect distant elements without long, tangled lines.
To create a jumper that links to an element:
- Right-click the element and choose Copy as jumper or use Ctrl/Cmd+C.
- Right-click anywhere on the board and Paste as jumper or use Ctr/Cmd+Shift+V.
Color themes
Colors can be applied to elements, branches, and connections to keep everything readable at a glance. Right-click any of these items and select a color theme from the menu's palette.
Components
We also create components, which are entities for characters, locations, items, and any other game object you need. Our demo has 2 characters, an Innkeeper and a Player, each with a description, attributes, and a cover image.
Drag a component onto an element to attach it.
Global variables
Next, we add three global variables, all integers: coins, drunkenness, and charm.
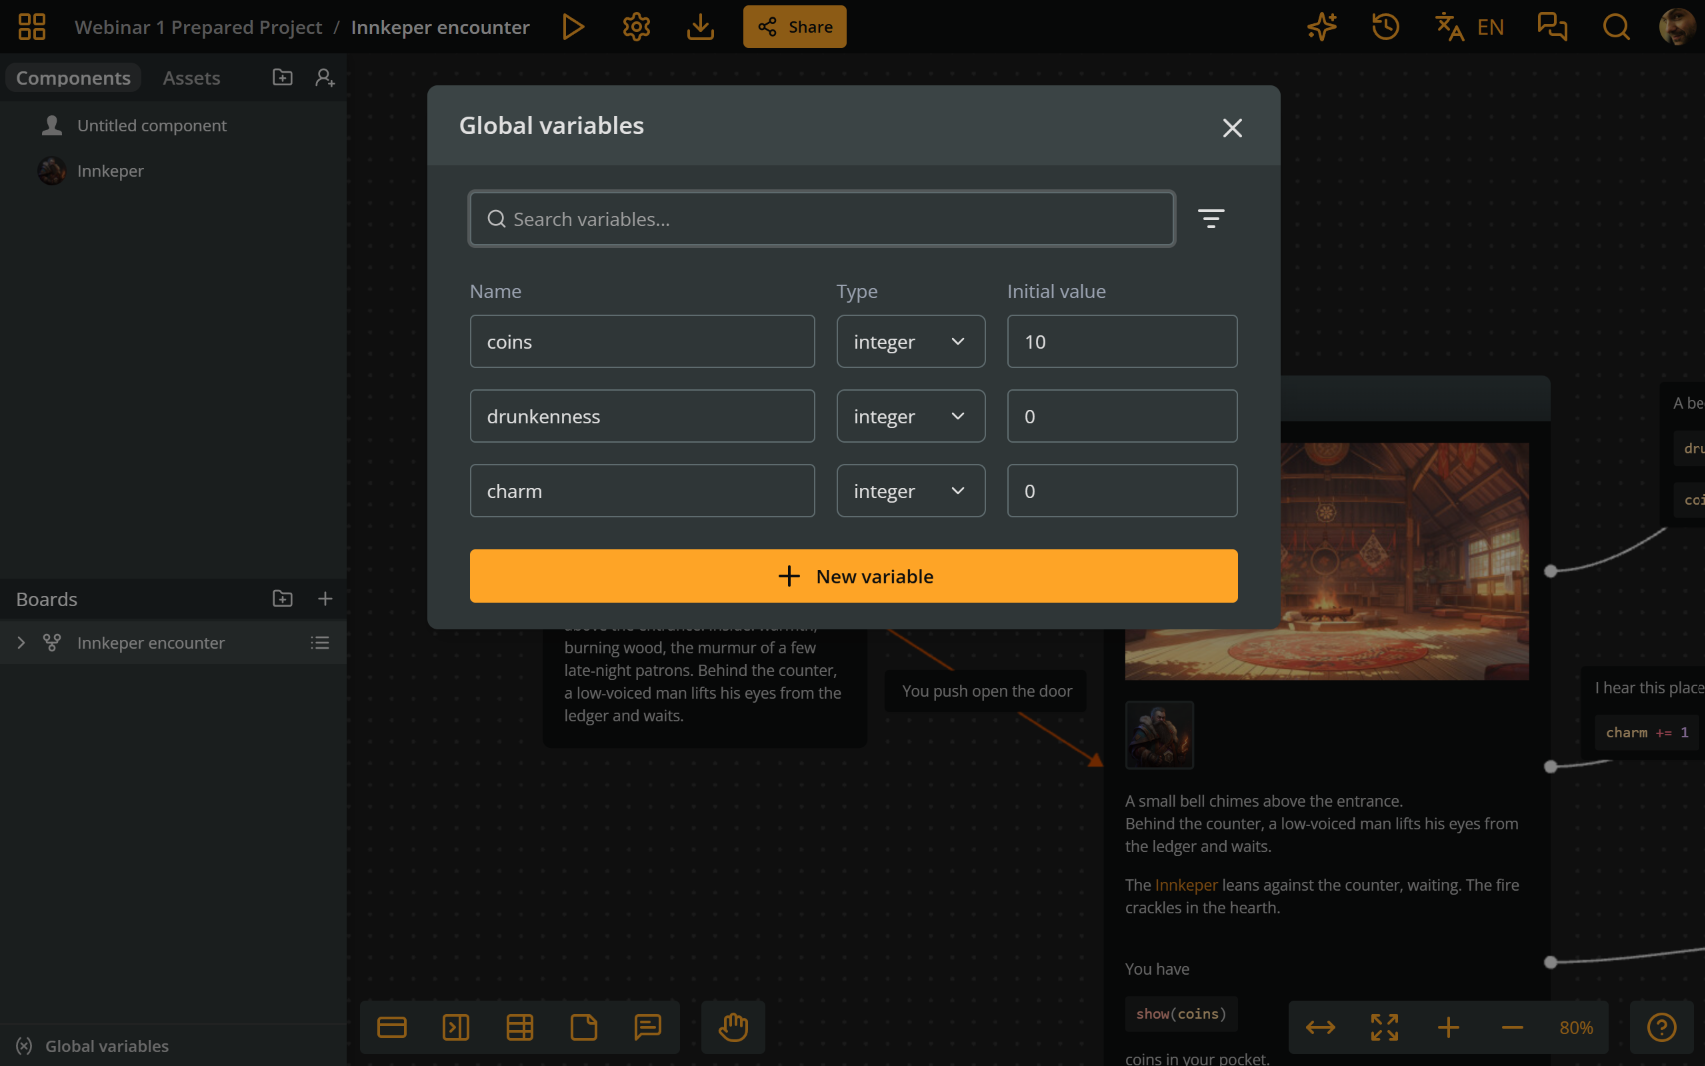
You can use variables in arcscript expressions, in elements, branches, and labels (see Logic and scripting, further below).
Assets
Assets are images, audio, and video files that you can add to and use in your project. Drag and drop an image into the editor to upload it to your project and it will show under Assets, at the top of the left sidebar.
From there, drag an image onto an element or component to use it as a cover.
Main dialogue hub
Using elements and connections, we built our dialogue's main hub. It has the following options:
- Ask for stories.
- Order a beer.
- Ask for a room.
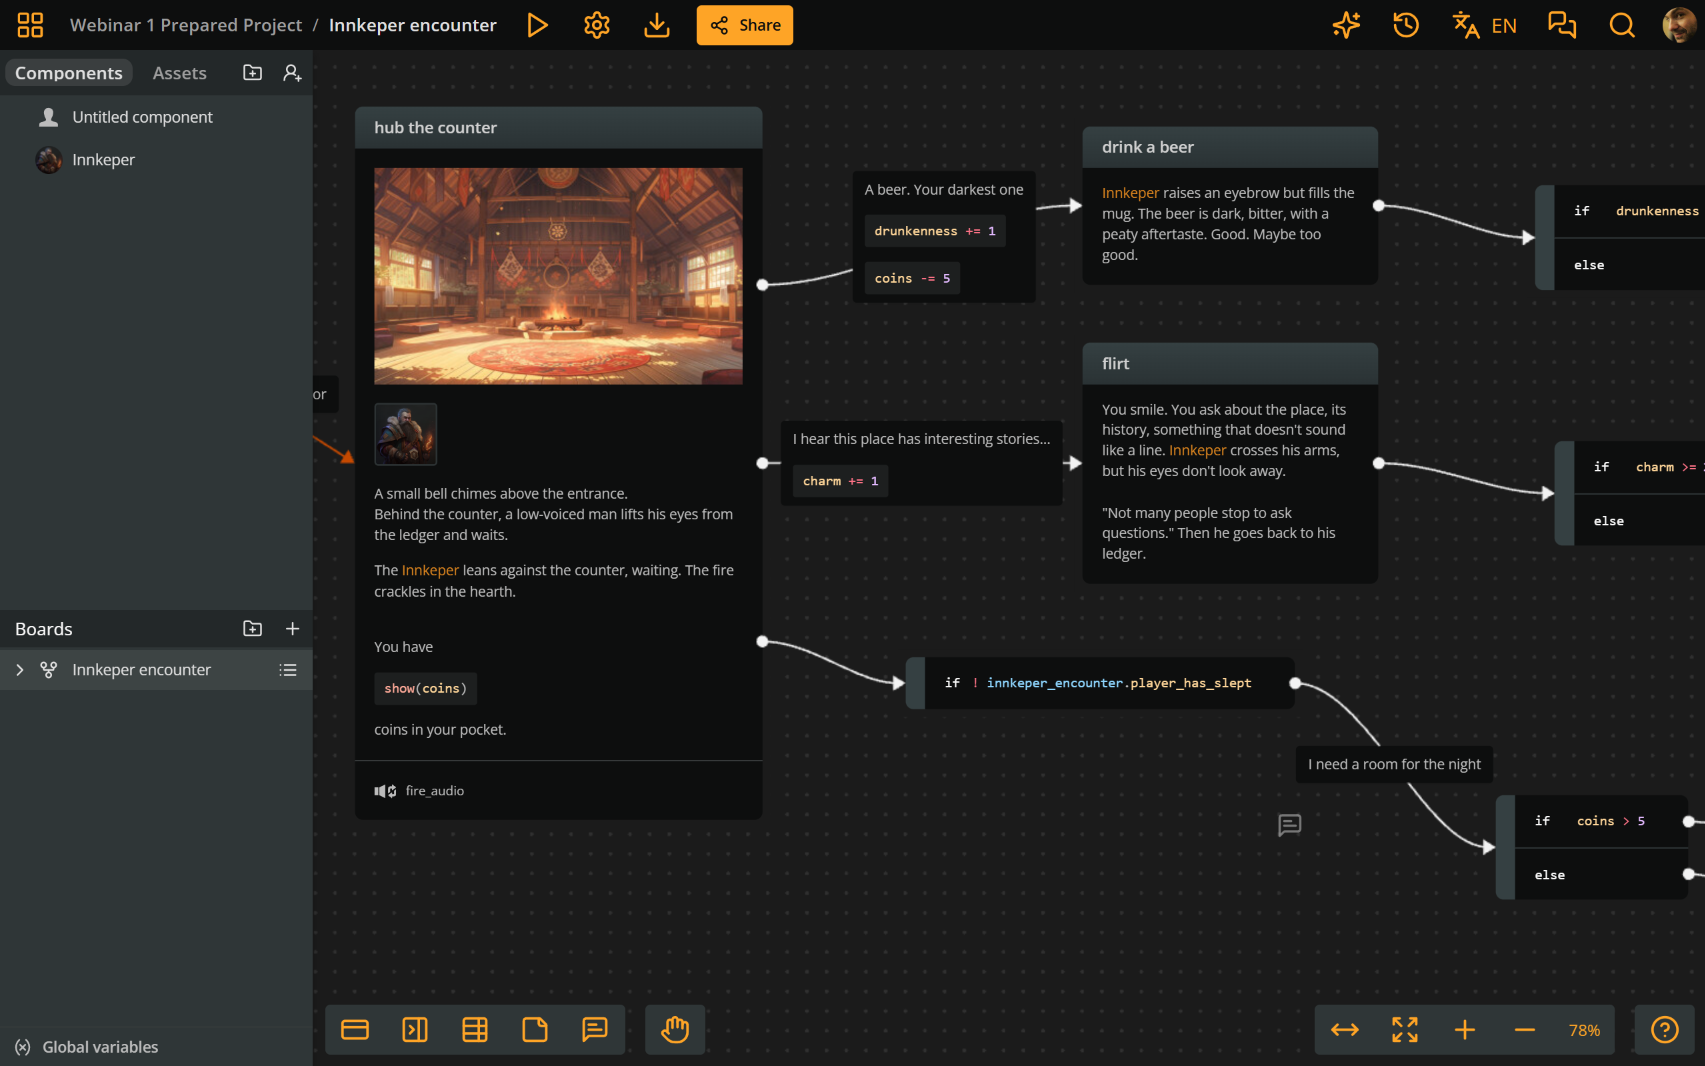
The above options are noted as connection labels, which then become the text of the option buttons players click in play mode.
Logic and scripting
You can use your project's variables in elements, branches, and labels with arcscript, Arcweave's scripting language.
Arcscript segments in elements and labels
Variable assignments
You can add arcscript segments in elements and connection labels, in order to assign values to your variables.
In our demo:
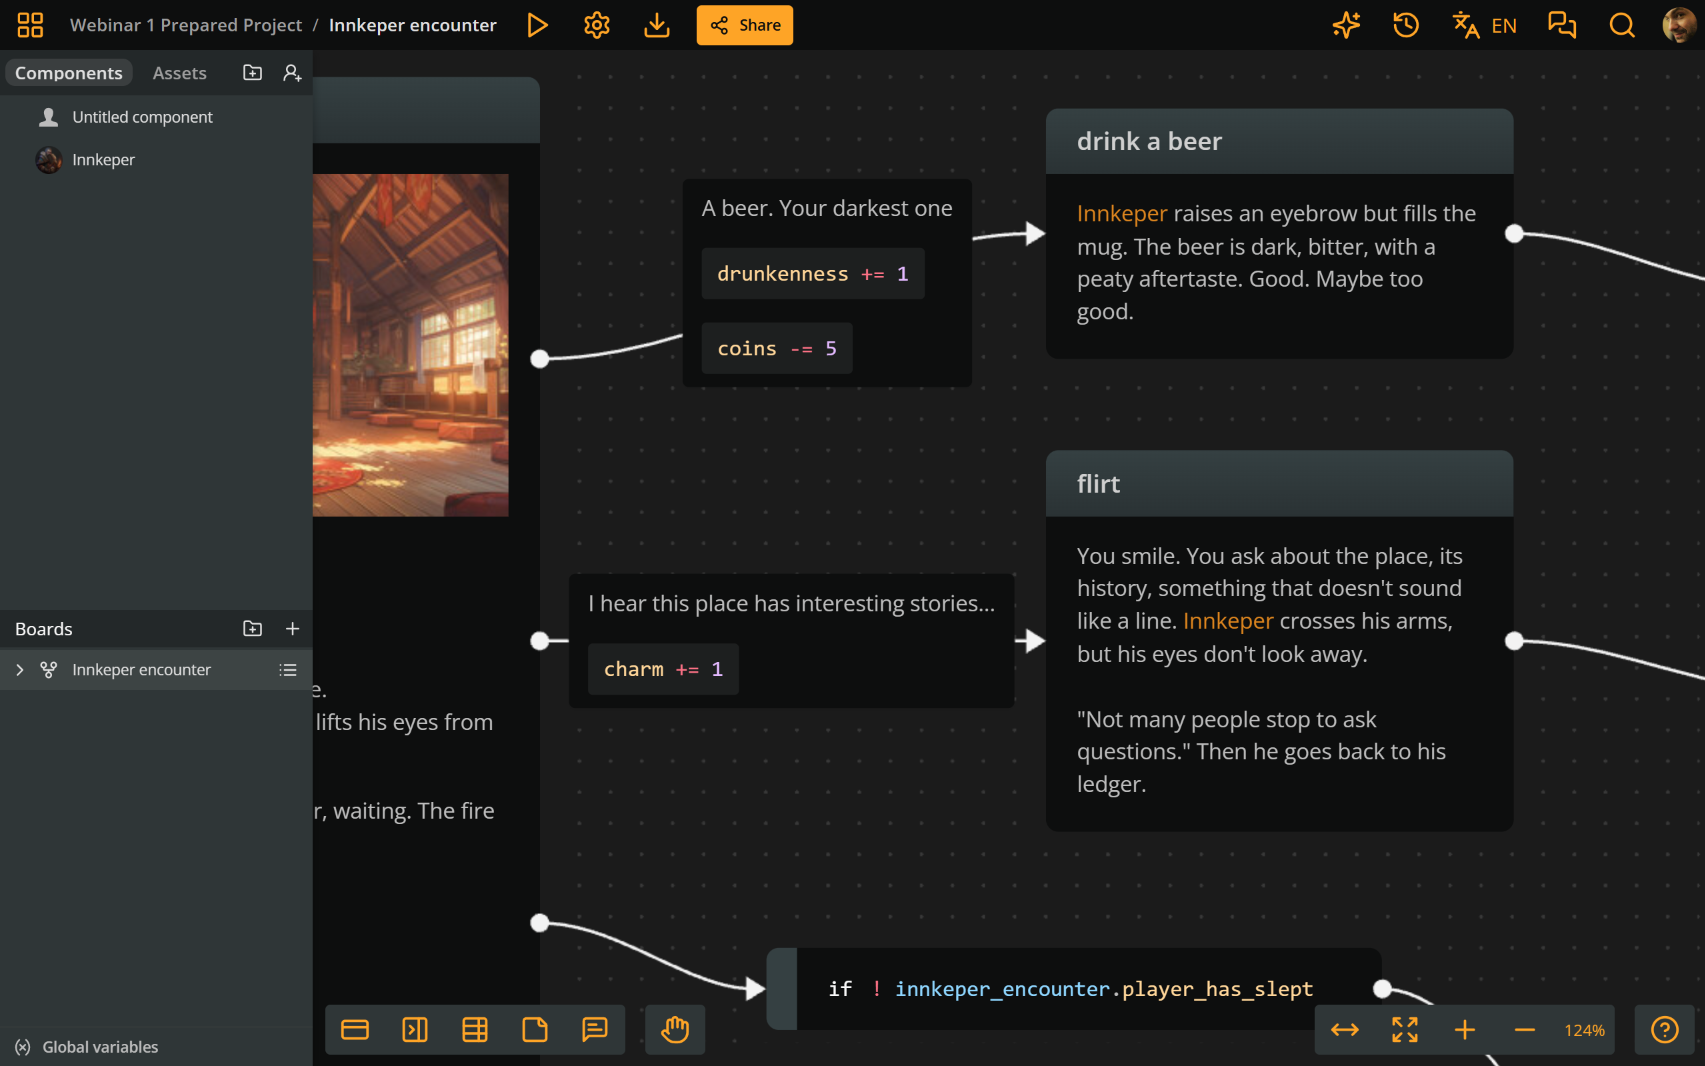
- Ordering a beer subtracts 5
coinsand adds 1 todrunkenness. This is done using the following expressions:coins -= 5drunkenness += 1
- Talking to the innkeeper adds 1 to your
charm:charm += 1
These expressions exist in the option labels.
Show variable values
For example, show(coins) displays the player's current number of coins.
Arcscript in branches
To divert the story flow according to conditions that check the story state, use branches.
In our example, rooms for rent are only available if the player has 5 or more coins.
Right click a branch and select Add else or Add else if to build fallback paths that determine what happens if the player has less than the required amount of coins.
Similarly, we also added a drunk ending: when drunkenness reaches 2, the story ends with the player thrown out of the tavern.
Test and debug
Play mode lets you test the story right in the browser. The Arcweave Debugger is especially handy, letting you observe and change variable values in real time. That means you can easily test any story branch.
We also touched on board variables, which have a narrower scope than global ones. They need a custom board ID (e.g. innkeeper_encounter for the board of this example) and are referenced through that ID plus the variable name, such as a boolean innkeeper_encounter.player_has_slept.
Play mode
Playtest and edit
Play Mode lets you play, debug, and directly edit your game, including rewriting element content and arcscript segments, and reordering labels. The changes are saved automatically back to the editor.
Style Editor
The Style Editor lets you control your story's presentation with custom CSS. Class names are listed in the documentation, and presets are available if you'd rather not start from scratch.
Share
Link, embed, and HTML file
You can share your project's Play Mode via a link or embed code. You can even download it as a stand-alone HTML file to upload it on platforms like itch.io.
It may be stand-alone, but it's still connected to the source of truth, i.e. your project: any updates you do appear automatically, with no re-exporting.
Get feedback
This enables a workflow we recommend: prototype quickly, share links with colleagues or clients, gather feedback, and iterate without waiting for engine builds.
Feedback tools are built in. Comments can be dropped anywhere on the board and can mention specific users, and notification settings and filters control what you receive.
History
History shows every design action and who made it. It allows you to iterate and restore earlier versions if something goes sideways.
Localization
Localization, available on Team workspaces, lets you add languages and manage your story's translations.
Moreover, you can choose which language to show in Play Mode and Export.
We fully demonstrate localization in the next Arcweave webinar.
Export
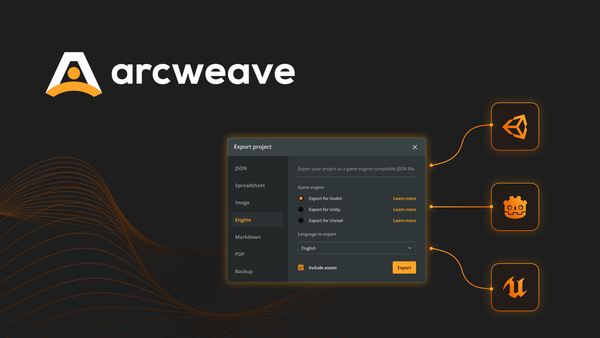
For export, Arcweave supports:
- JSON
- Spreadsheets
- Images
- JSON for game engines
- Markdown
- Backup
Beyond just exporting, Arcweave provides its own REST API (available in Team workspaces), which lets you sync projects with your own solution or engine in real time.
Sneak peek: bring it into Unity
To close the session, here's a quick preview of how you can import your Arcweave story into Unity:
- Export the project for the engine, including assets.
- Import the JSON into a Unity scriptable object, then import the images and audio.
- Press play.
Content, choices, logic, variables, and assets all came across. A script reads the project data (element content, component names, images, and audio) and places it into the UI.
Other webinars
If you enjoyed this webinar, you can also watch the recording of the next one, on game localization without the chaos, right here on our blog.
And if you'd like to catch our webinars live, hop onto our Discord server, where we announce each session ahead of time. We'd love to see you there!
Arcweave lets you prototype and test narrative quickly, without pulling favors from your dev team.
Real-time collaboration, cloud-based sharing, and history make iteration and feedback much faster than traditional export-and-build cycles, and re-importing into Unity after changes is quick. Start creating in Arcweave for free, today!